Setting Up Google OAuth with Supabase
This guide will walk you through setting up Google OAuth for your Supabase project. Follow these steps to enable Google sign-in for your application.
Steps to Set Up Google OAuth (Old Version)
Note: If you are using the new Google OAuth consent screen experience and not the older one, please skip this section and proceed to the next section below for updated instructions.
-
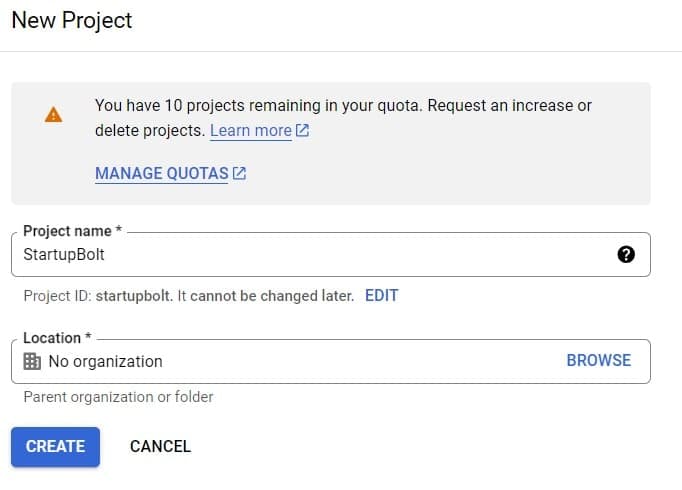
Set up a Google Cloud project:
- Go to the Google Cloud Console (opens in a new tab) and create a new project if necessary.
-
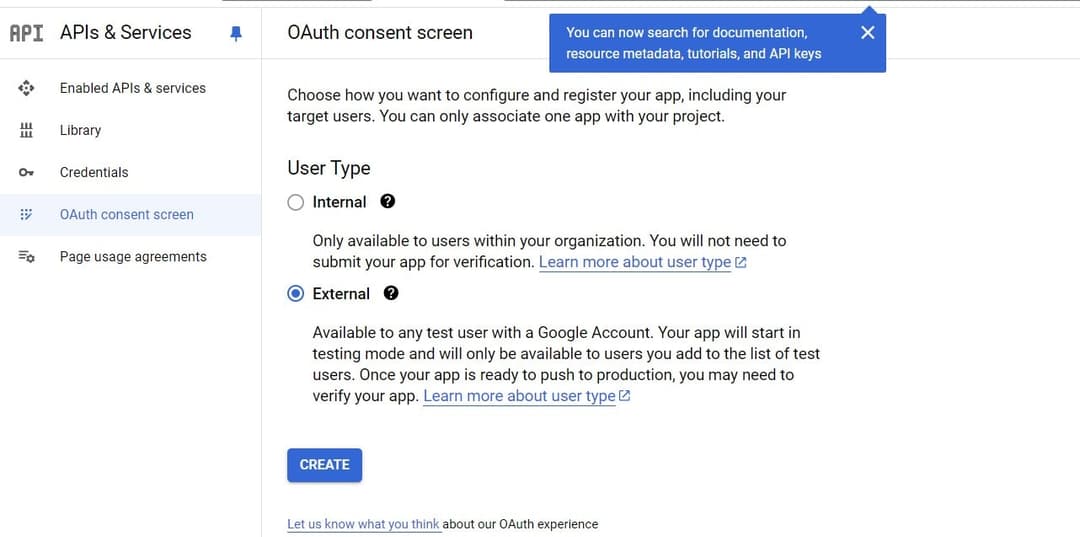
Configure the OAuth consent screen:
- In the Google Cloud Console, navigate to the OAuth consent screen (opens in a new tab) page found under API & Services > OAuth consent screen
- Select user type as External and click Create.
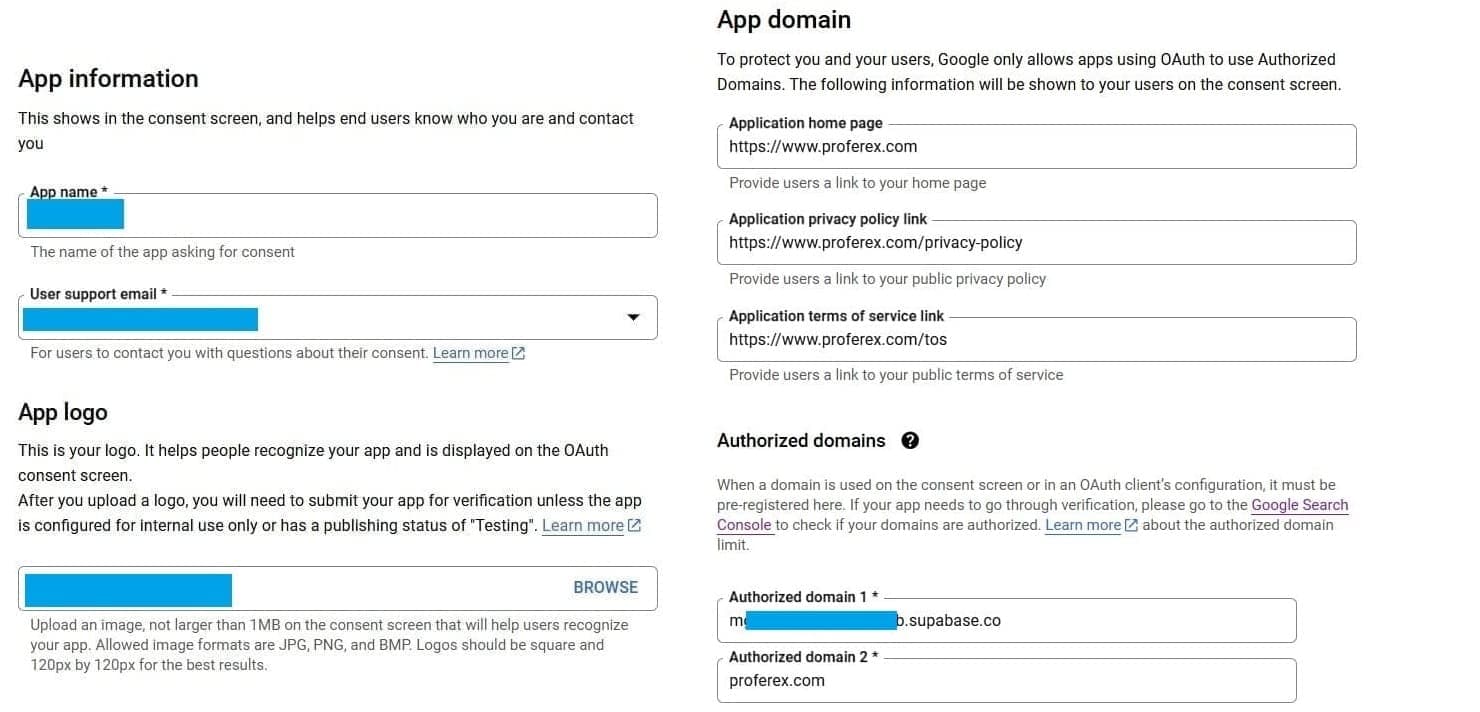
- Fill in your app information:
- Website name
- Website logo
- Website homepage link
- Privacy policy link
- Terms of service link
- Under Authorized domains, add your homepage domain and your Supabase project's domain (which is in the format
<PROJECT_ID>.supabase.co). You can find it in Supabase by navigating to Project Settings > Configuration > Data API.
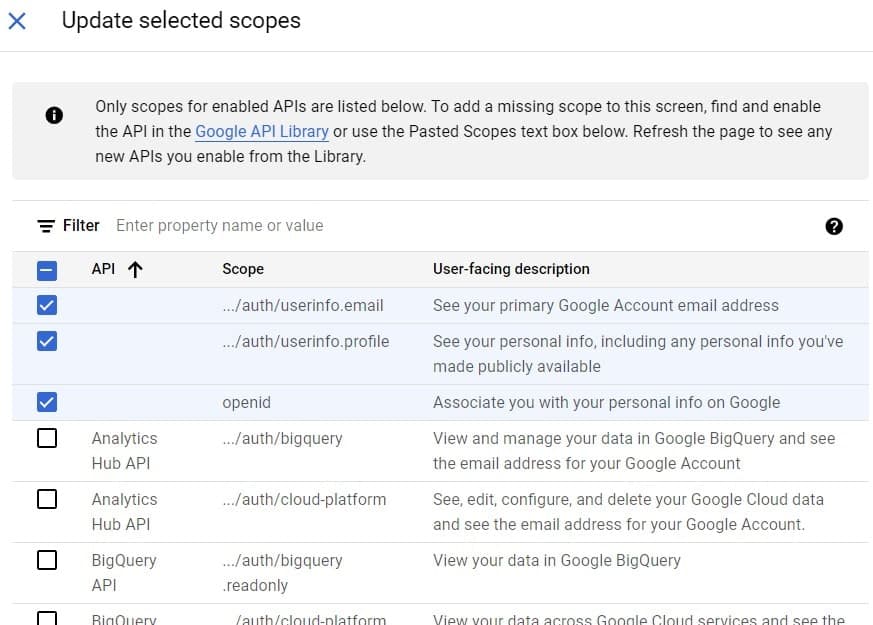
- Add the following non-sensitive scopes:
.../auth/userinfo.email.../auth/userinfo.profileopenid
- Add yourself as a test user. Save and continue.
-
Create OAuth credentials:
- Go to the API credentials page (opens in a new tab) under API & Services > Credentials.
- Click Create credentials and choose OAuth Client ID.
- For application type, choose Web application.
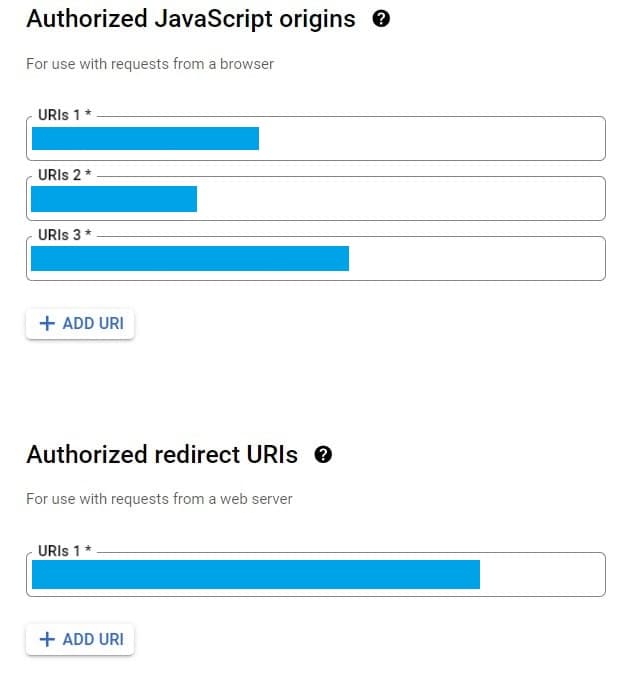
- Under Authorized JavaScript origins, add your site URL, your Supabase project URL (found in Supabase by navigating to Project Settings > Configuration > API), and localhost URL including port like 3000 (so that it works in localhost).
- Copy the Callback URL from Supabase. Navigate to Supabase Dashboard, then to Authentication > Sign In / Up > Auth Providers and select Google. Enable sign-in with Google and copy the Callback URL (for OAuth), which will be in the format:
https://project-name.supabase.co/auth/v1/callback. - Under Authorized redirect URLs in Google, enter the callback URL from the Supabase dashboard.
- Click Create.
-
Configure Google OAuth in Supabase:
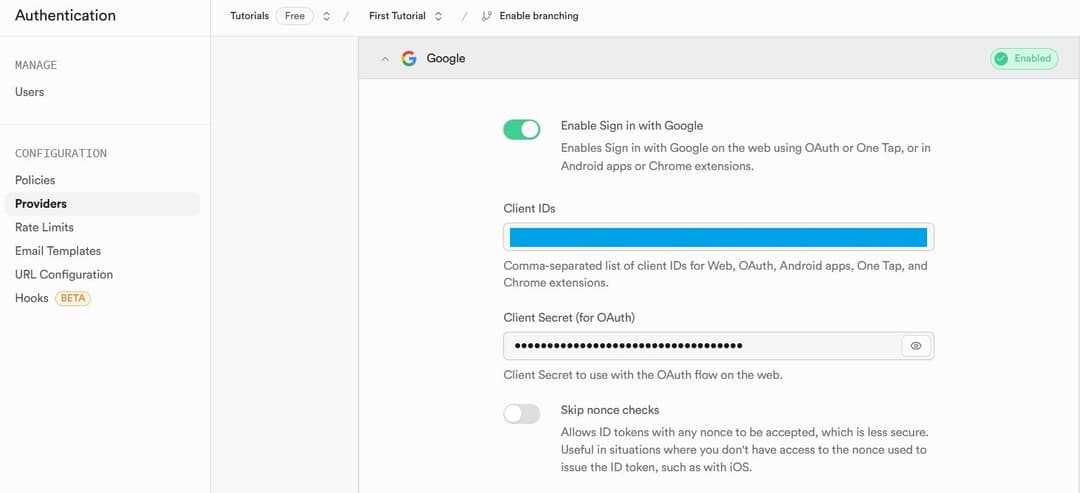
- When you finish configuring your credentials, you will be shown your client ID and secret. Add these to the Google Auth Provider section of the Supabase Dashboard by navigating to Authentication > Sign In / Up > Auth Providers and select Google. And then click save.
- Go to Authentication > URL Configuration in Supabase.
- Add
http://localhost:3000to Site URL. - Add
http://localhost:3000/*to Redirect URLs.
Note: Your Google auth will work in localhost already. If you are ready to go to production, you can proceed to the next step and complete verification. Apps in development, testing, or staging are not applicable for verification.
-
Publish and verify your app (for production):
- Go to API & Services > OAuth Consent Screen in Google again and click Publish App.
- Once your app is published to production, click "Prepare for Verification" to submit your app for verification.
- Go to Authentication > URL Configuration in Supabase.
- Add
https://your-domain.comto Site URL. - Add
https://your-domain.com/*to Redirect URLs.
-
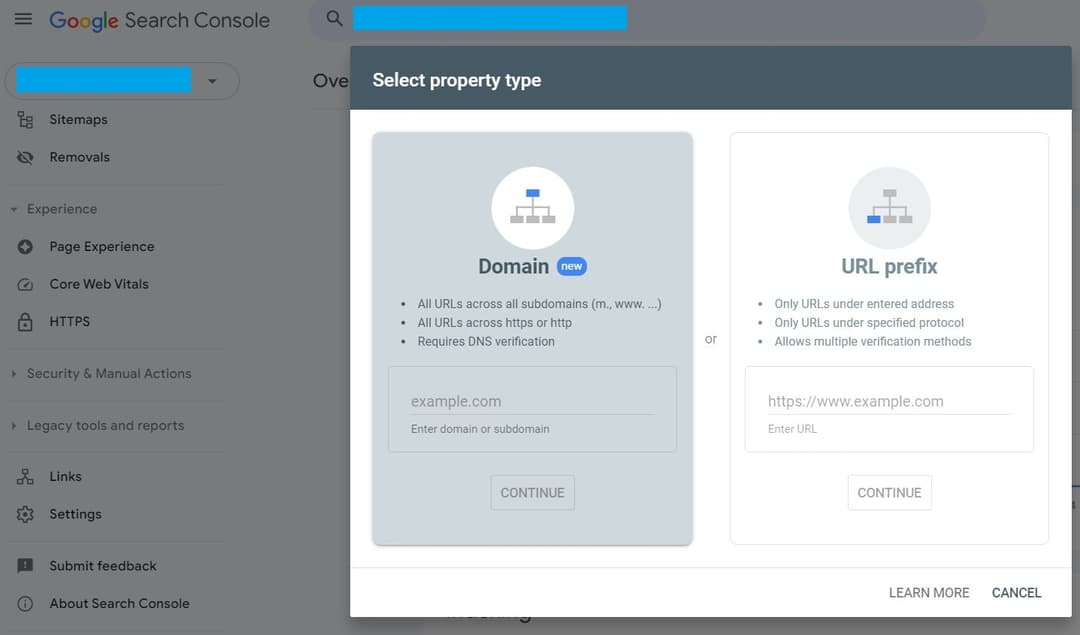
Verify your domain:
Lastly, get your domain verified in Google Search Console (opens in a new tab).
The Google OAuth review team will review your application and email you. You usually need to reply to get OAuth approved. This process might take a few days.
Steps to Set Up Google OAuth (New Version)
-
Set up a Google Cloud project:
- Go to the Google Cloud Console (opens in a new tab) and create a new project if necessary.
-
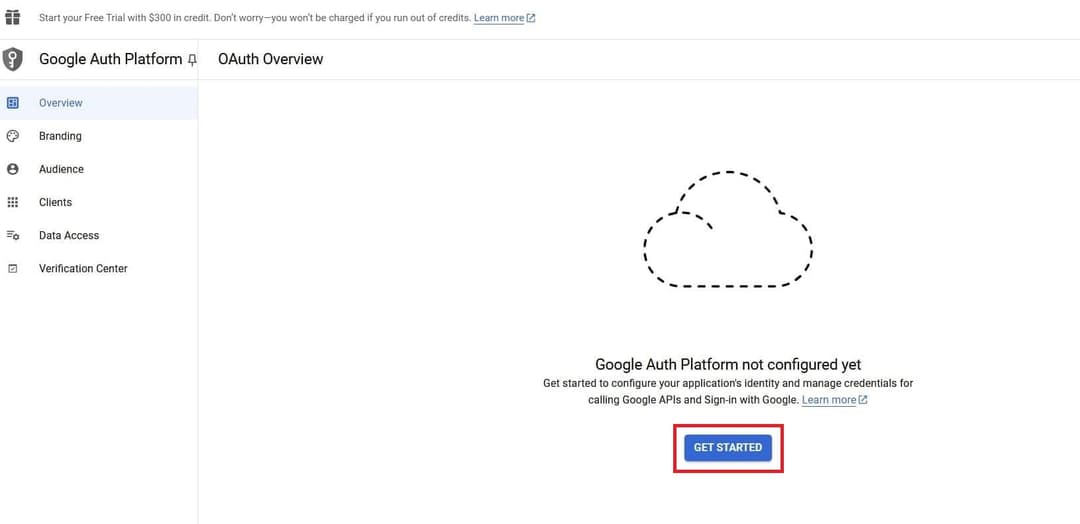
Configure the OAuth consent screen:
- In the Google Cloud Console, navigate to the OAuth Overview (opens in a new tab) page found under Google Auth Platform > Overview
- Click on Get Started.
- Fill you App name and email. Then click Next.
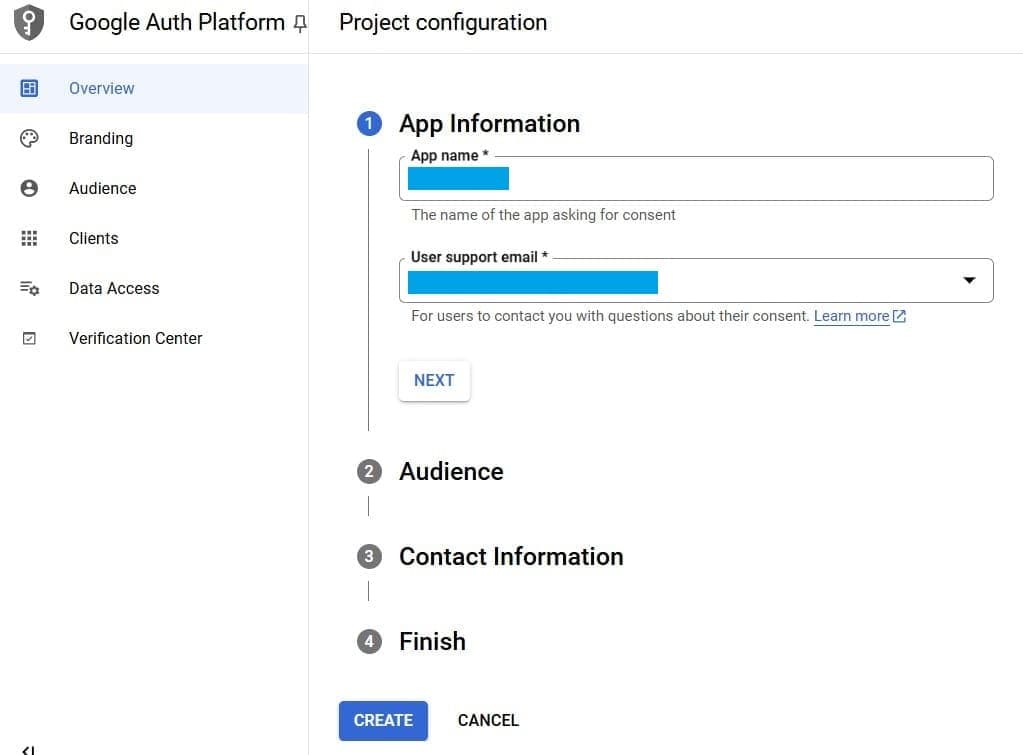
- Select user type as External and click Next.

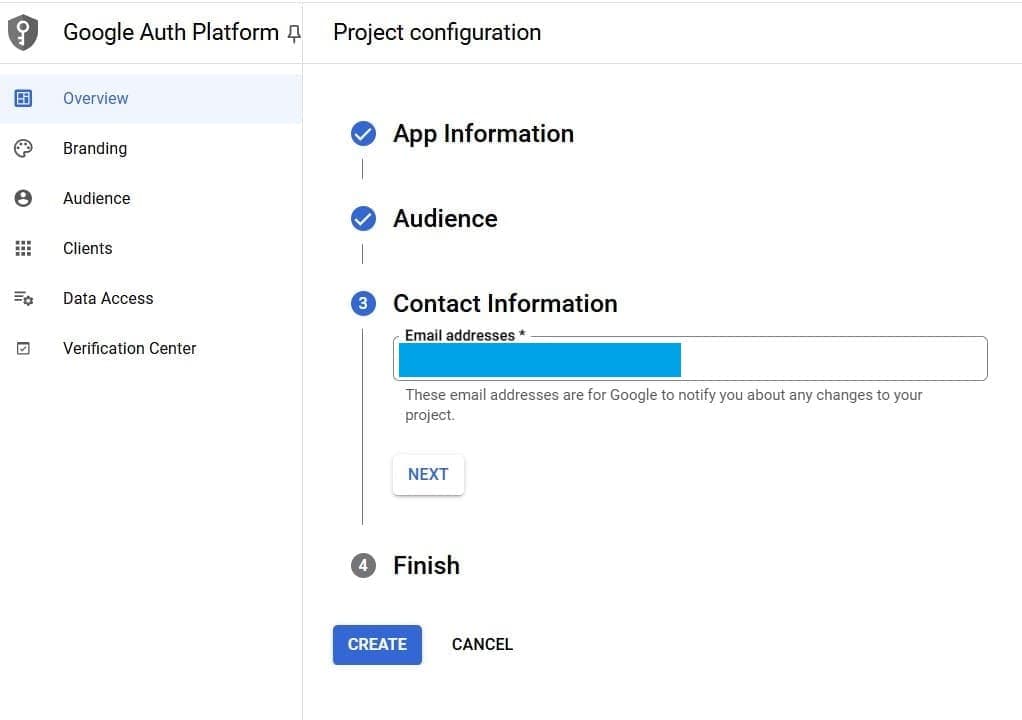
- Fill your contact information, finish and click Create.
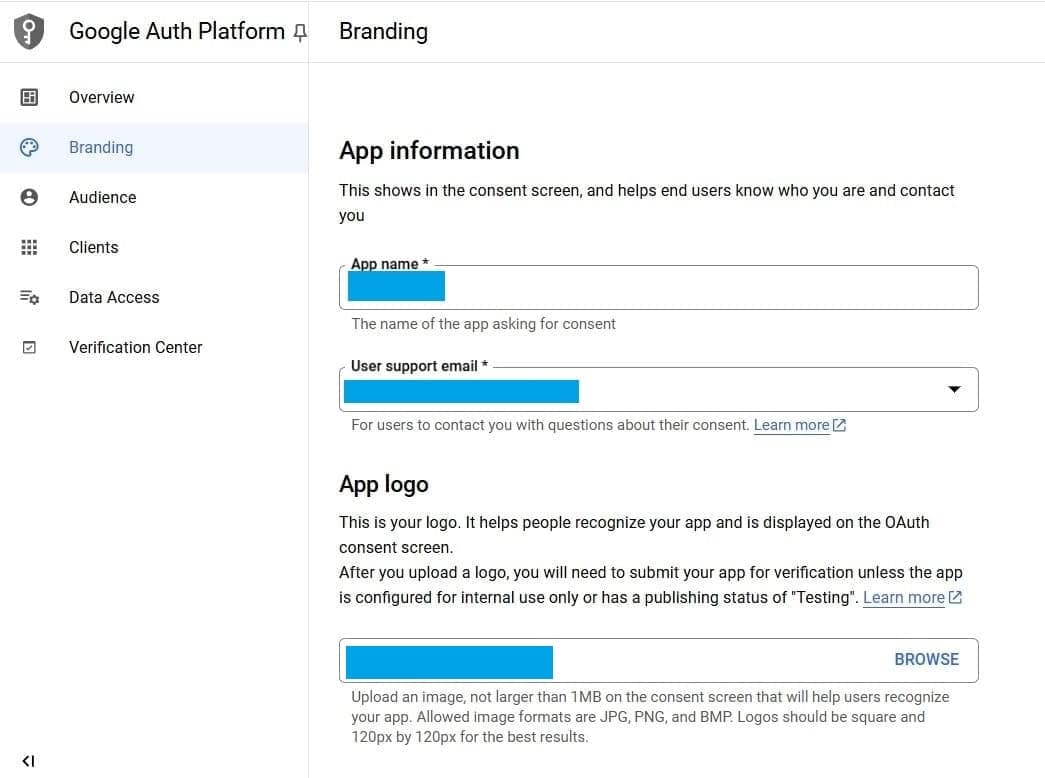
- Then go to Branding. And fill in your app information:
- Website name
- Website logo
- Website homepage link
- Privacy policy link
- Terms of service link
- Under Authorized domains, add your homepage domain and your Supabase project's domain (which is in the format
<PROJECT_ID>.supabase.co). You can find it in Supabase by navigating to Project Settings > Configuration > API.
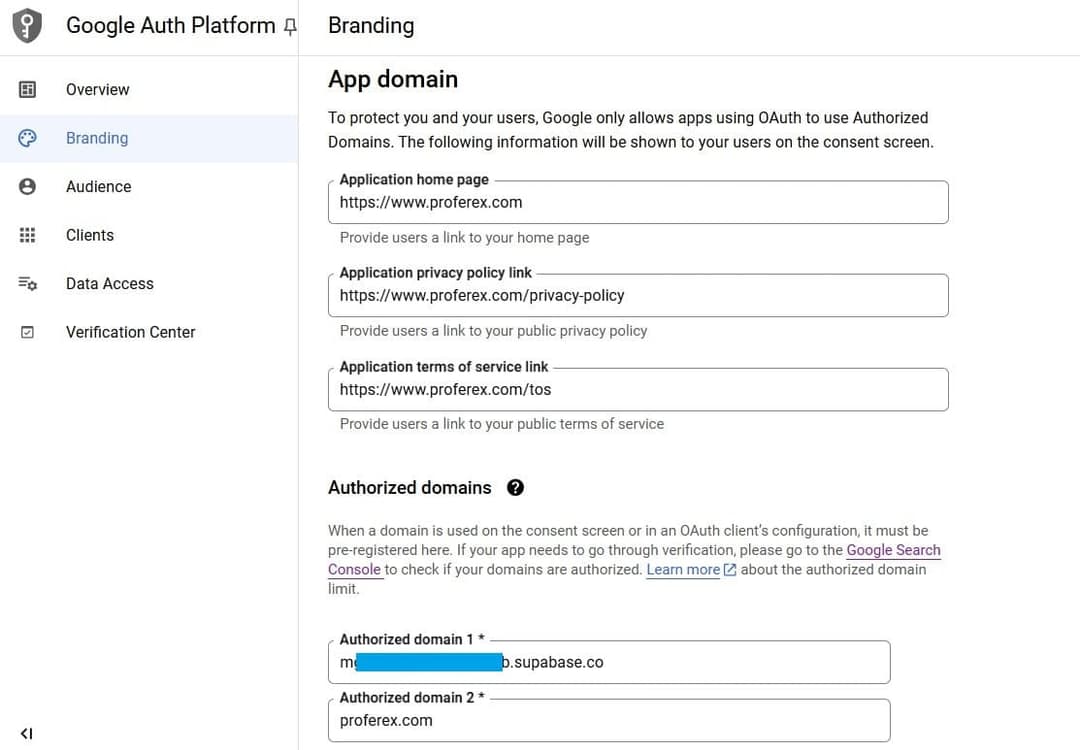
- Then click on Save.
- Then go to Data Access. And click on "Add or remove scopes".
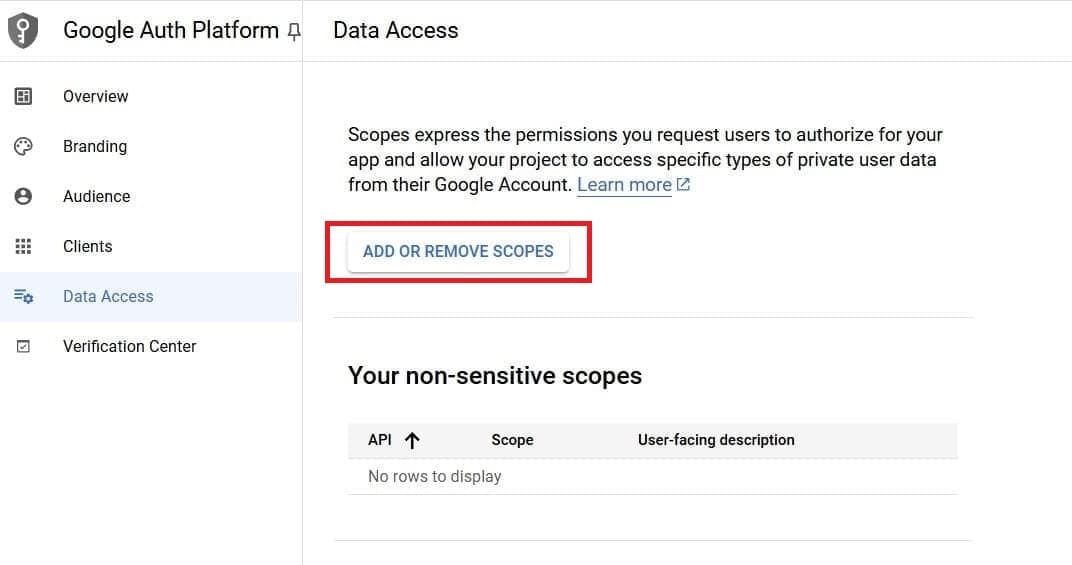
- Add the following non-sensitive scopes:
.../auth/userinfo.email.../auth/userinfo.profileopenid
- Click on Update. And then save.
-
Create OAuth credentials:
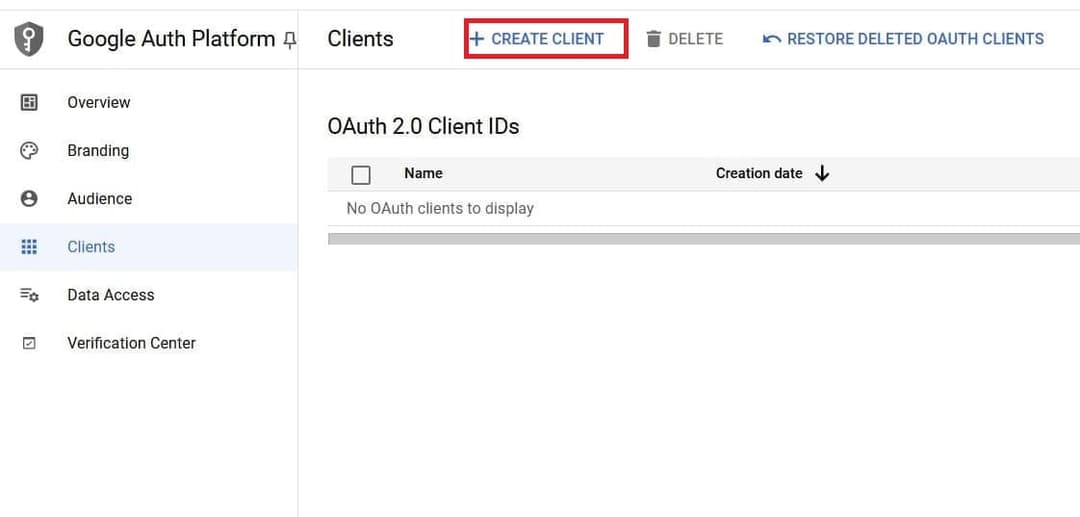
- Go to Clients. And click on "Create Client".
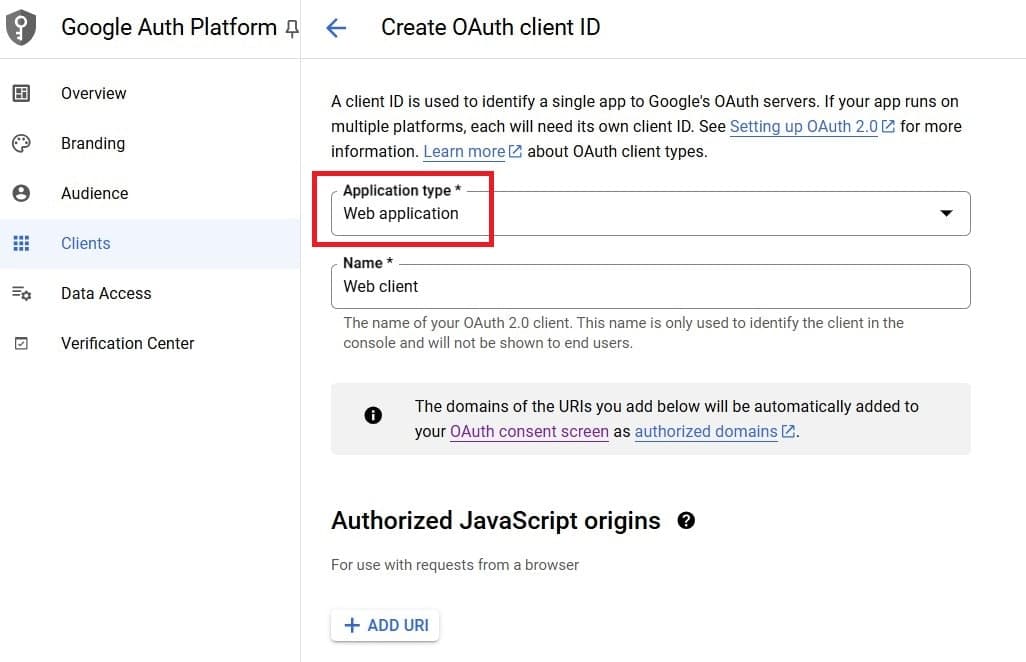
- For application type, choose Web application. You can give any name for the client.
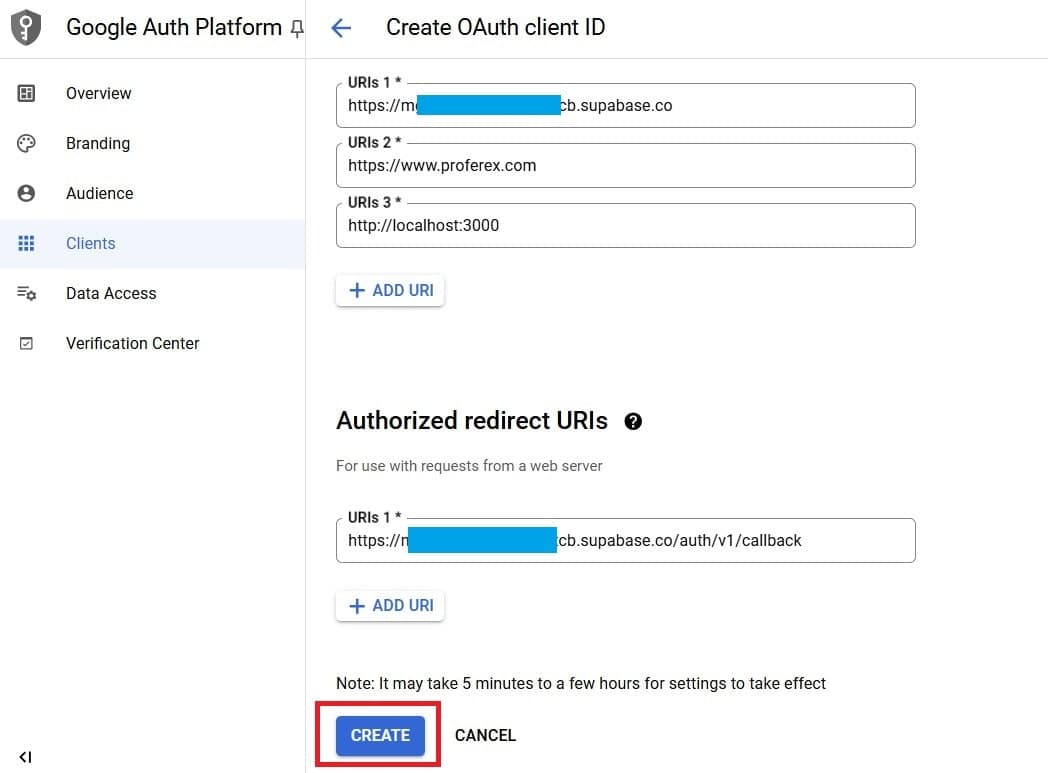
- Scroll down to Authorized JavaScript origins and Authorized redirect URIs.
- Under Authorized JavaScript origins, add your site URL, your Supabase project URL (found in Supabase by navigating to Project Settings > Configuration > API), and localhost URL including port like 3000 (so that it works in localhost).
- Copy the Callback URL from Supabase. Navigate to Supabase Dashboard, then to Authentication > Providers and select Google. Enable sign-in with Google and copy the Callback URL (for OAuth), which will be in the format:
https://project-name.supabase.co/auth/v1/callback. - Under Authorized redirect URLs in Google, enter the callback URL from the Supabase dashboard.
- Click Create.
-
Configure Google OAuth in Supabase:
- When you finish configuring your credentials by completing the above steps, you will be shown your client ID and secret. Add these to the Google Auth Provider section of the Supabase Dashboard by navigating to Authentication > Providers and select Google. And then click save.
- Go to Authentication > URL Configuration in Supabase.
- Add
http://localhost:3000to Site URL. - Add
http://localhost:3000/*to Redirect URLs.
Note: Your Google auth will work in localhost already. If you are ready to go to production, you can proceed to the next step and complete verification. Apps in development, testing, or staging are not applicable for verification.
-
Publish and verify your app (for production):
- Go to Audience in Google again and click Publish App.
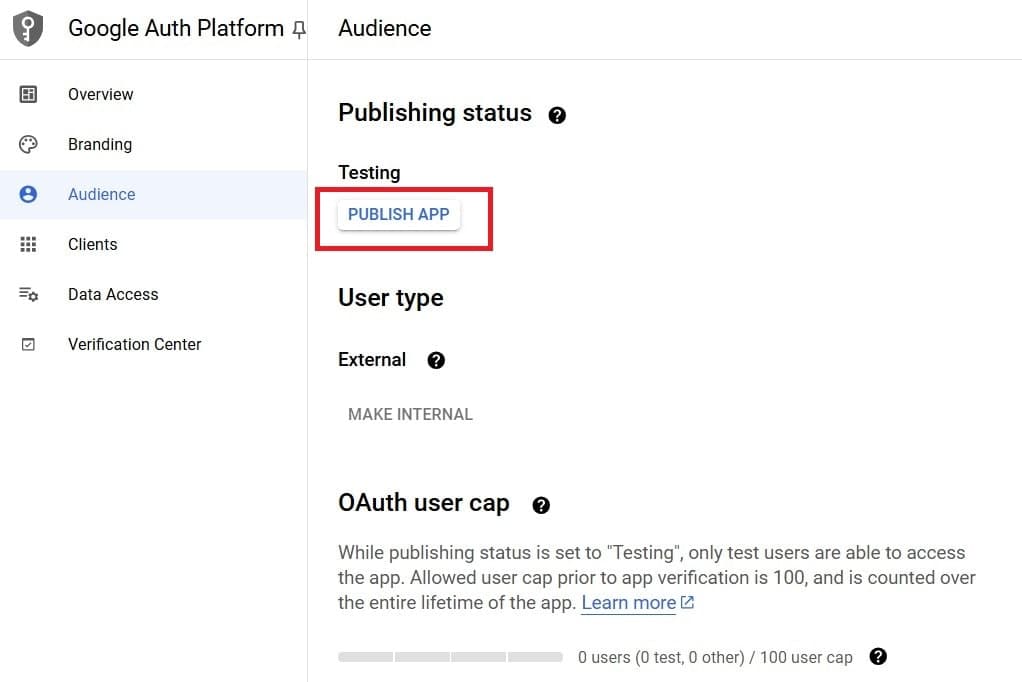
- Once your app is published to production, click "Prepare for Verification" to submit your app for verification.
- Go to Authentication > URL Configuration in Supabase.
- Add
https://your-domain.comto Site URL. - Add
https://your-domain.com/*to Redirect URLs.
-
Verify your domain:
Lastly, get your domain verified in Google Search Console (opens in a new tab).
The Google OAuth review team will review your application and email you. You usually need to reply to get OAuth approved. This process might take a few days.
That's it! Your Google OAuth setup with Supabase is complete! 😄