X Ads
X Ads are paid advertisements where you pay X (formerly Twitter) to promote your products on their platform. In this section, we'll cover how to set up X Ads with StartupBolt.
To run ads on X, visit X Ads Platform (opens in a new tab) and sign in with your X account. You’ll need to fill in some information, including business, payment, and tax details, and then you’re all set to start running ads.
Conversion Tracking
To effectively measure the performance of your advertising campaigns, it's important to track conversions accurately. When a conversion or click happens, X needs to attribute that event to a specific user.
X uses the Twitter Pixel (X Pixel) for tracking. There are two types of pixels you need to set up:
- Twitter Base Pixel: This tracks visits to your website and initializes the pixel, enabling you to track additional events via event code or create audiences using Audience Manager.
- Twitter Event Pixel: This requires the Base Pixel to be implemented first. It allows you to track specific actions on your website, such as checkout and purchase events.
We will set up both using Google Tag Manager.
X also supports the Conversion API, but X recommends using the X Pixel for most advertisers. Therefore, we will only implement the X Pixel for tracking in this guide.

If you need assistance setting up the Conversion API for X with StartupBolt, feel free to email me at startupbolt@gmail.com or reach out on Twitter at https://x.com/nifal_adam (opens in a new tab). I’ll be happy to help or provide additional instructions. Let’s proceed.
Steps to Set Up Conversion Tracking in X
-
Set Up the X Pixel
- Visit X Ads Platform (opens in a new tab) and sign in with your X account.
- Go to Tools > Events Manager.
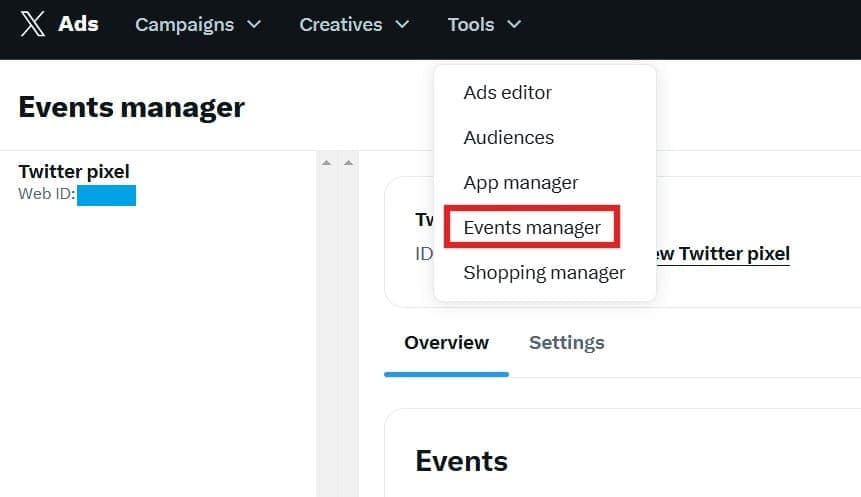
- Not seeing a Tools tab in your account? This might be because a credit card hasn’t been added to your account. Please add a credit card first.
- Click on Add Event Source and agree to X’s terms of use by selecting “I agree.”
- You will be directed to the Install Pixel Code page.
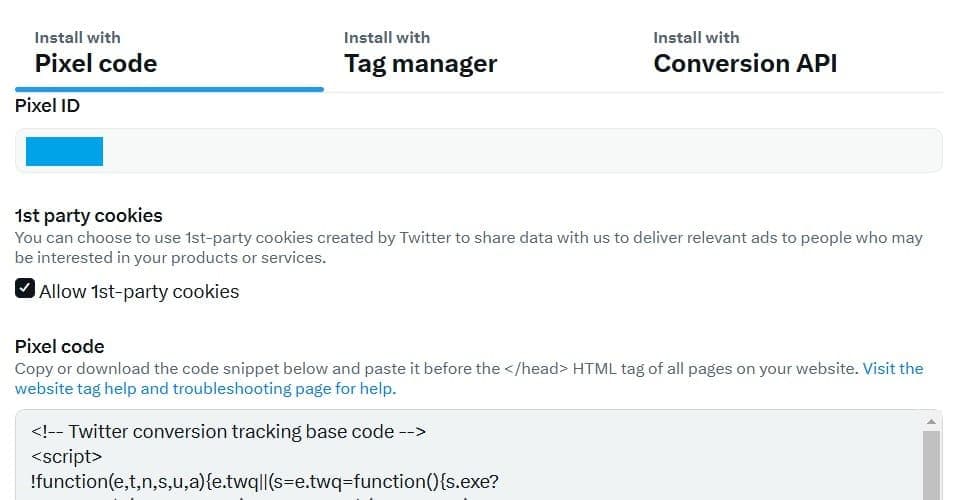
- Click the Save Event Source button to save your new pixel.
- Copy the Twitter Pixel ID, as you’ll need this later when setting up the tag in Google Tag Manager.
-
Create Purchase Event
- You will be brought back to the Events Manager main screen.
- Next, you’ll need to create events to track specific actions on your website. We will implement the “Checkout Initiated” and “Purchase” events.
- Click the Add Events button.
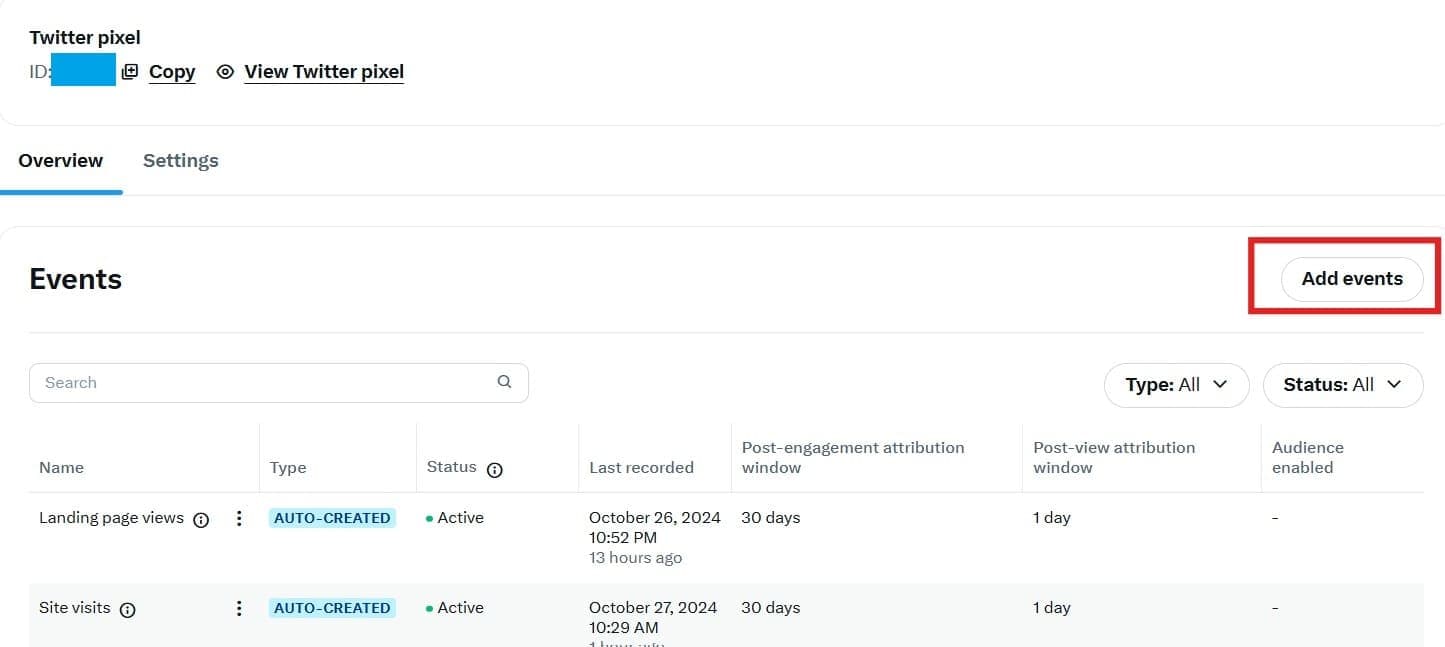
- On the Event Details screen, enter the name "Purchase" for the event. Choose Purchase from the Event Type dropdown. Leave the attribution window as is, and keep Website activity audience toggled on.
- Click Next.
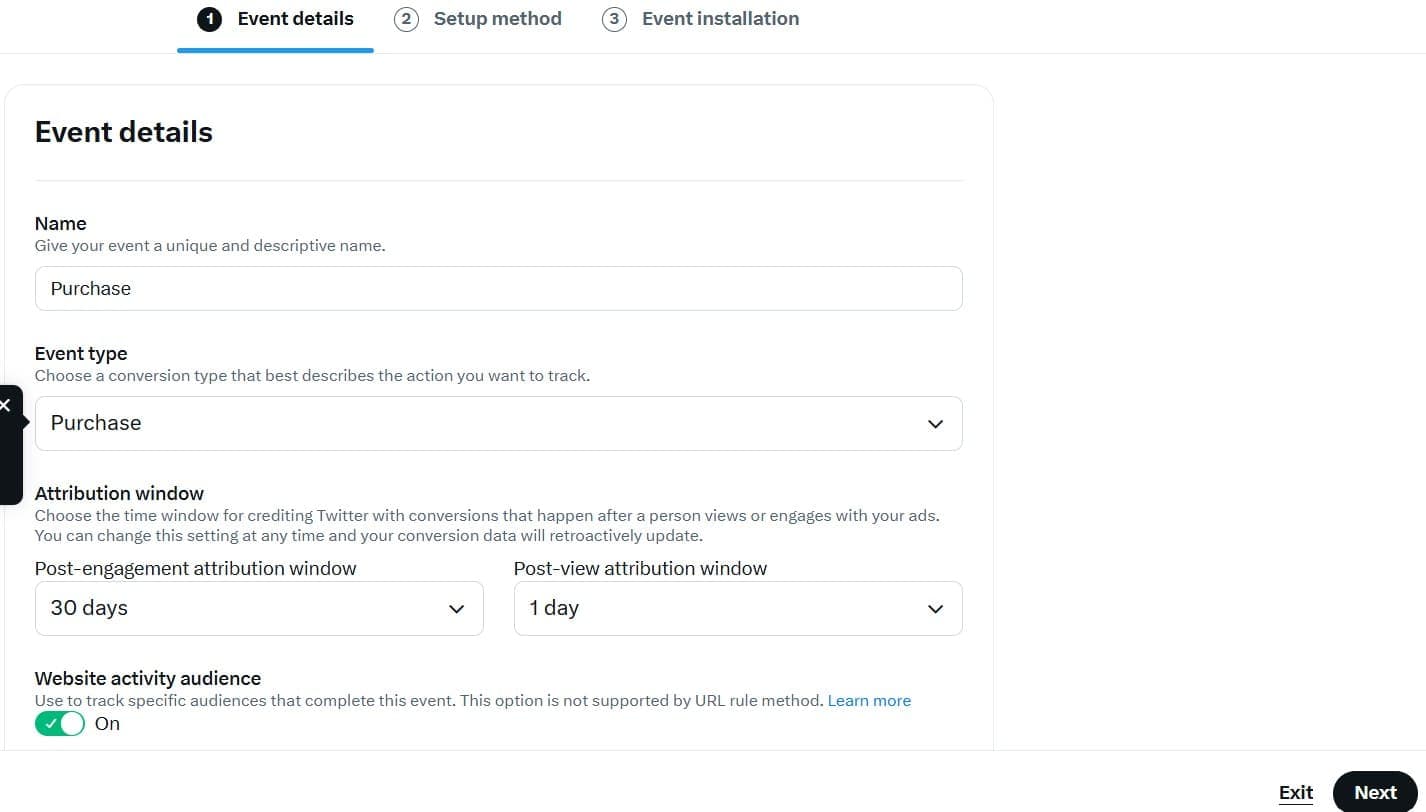
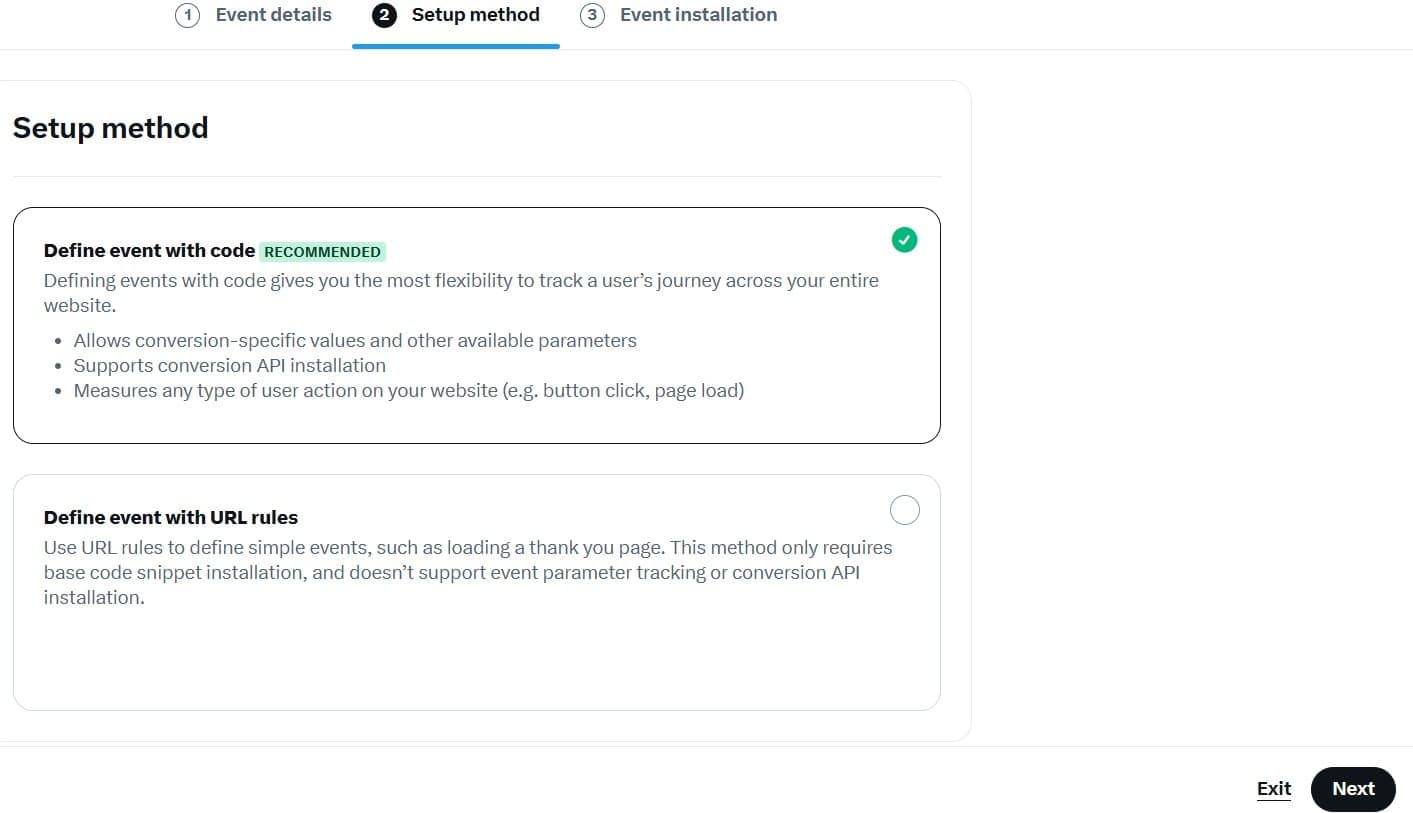
- Set the Setup Method to Define Event with Code. Click Next.
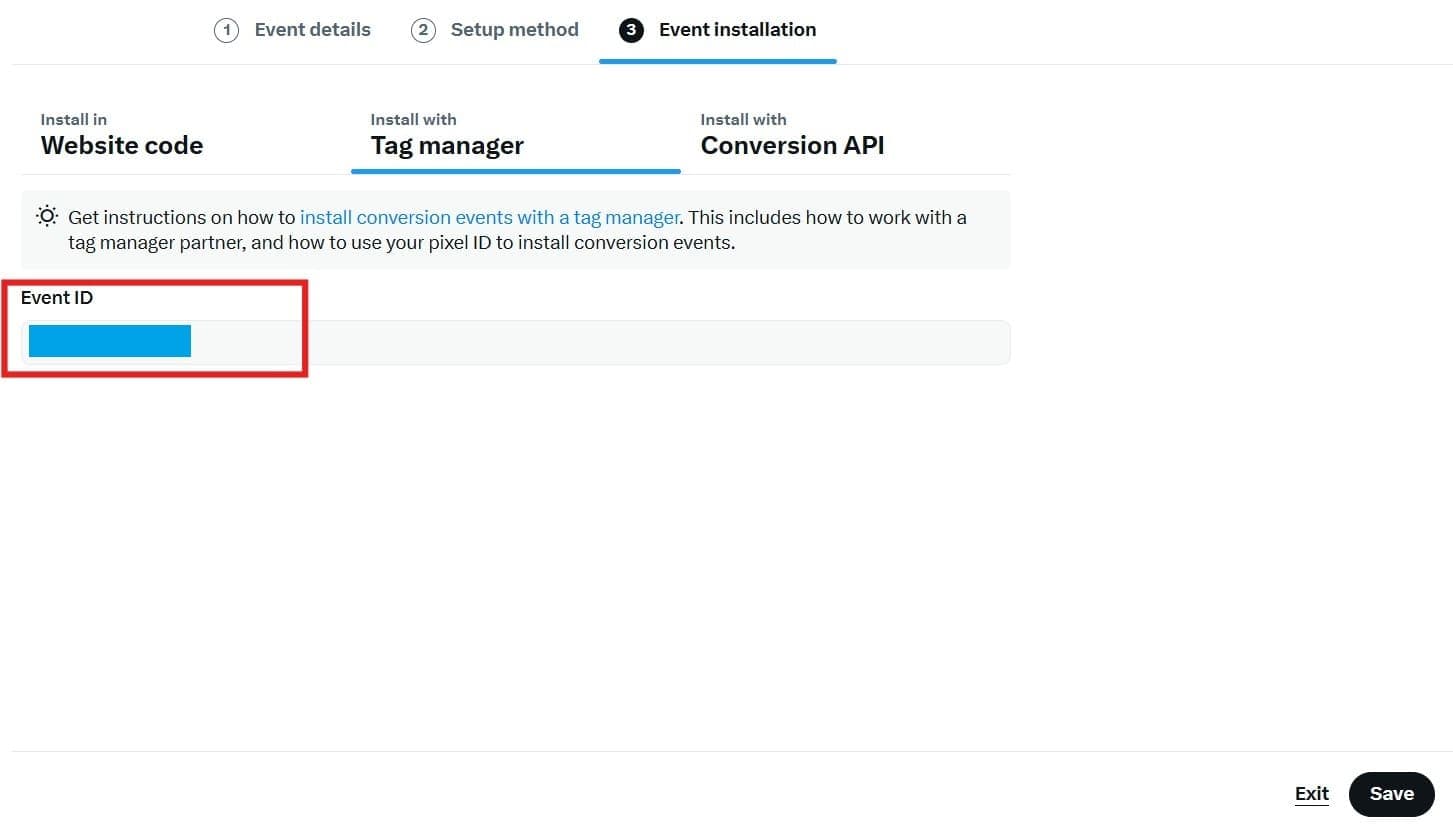
- In the Event Installation section, select the Install with Tag Manager tab and copy the Event ID. You will need this later when adding the event to Google Tag Manager.
-
Create Checkout Initiated Event
- Now, let's create the Checkout Initiated event.
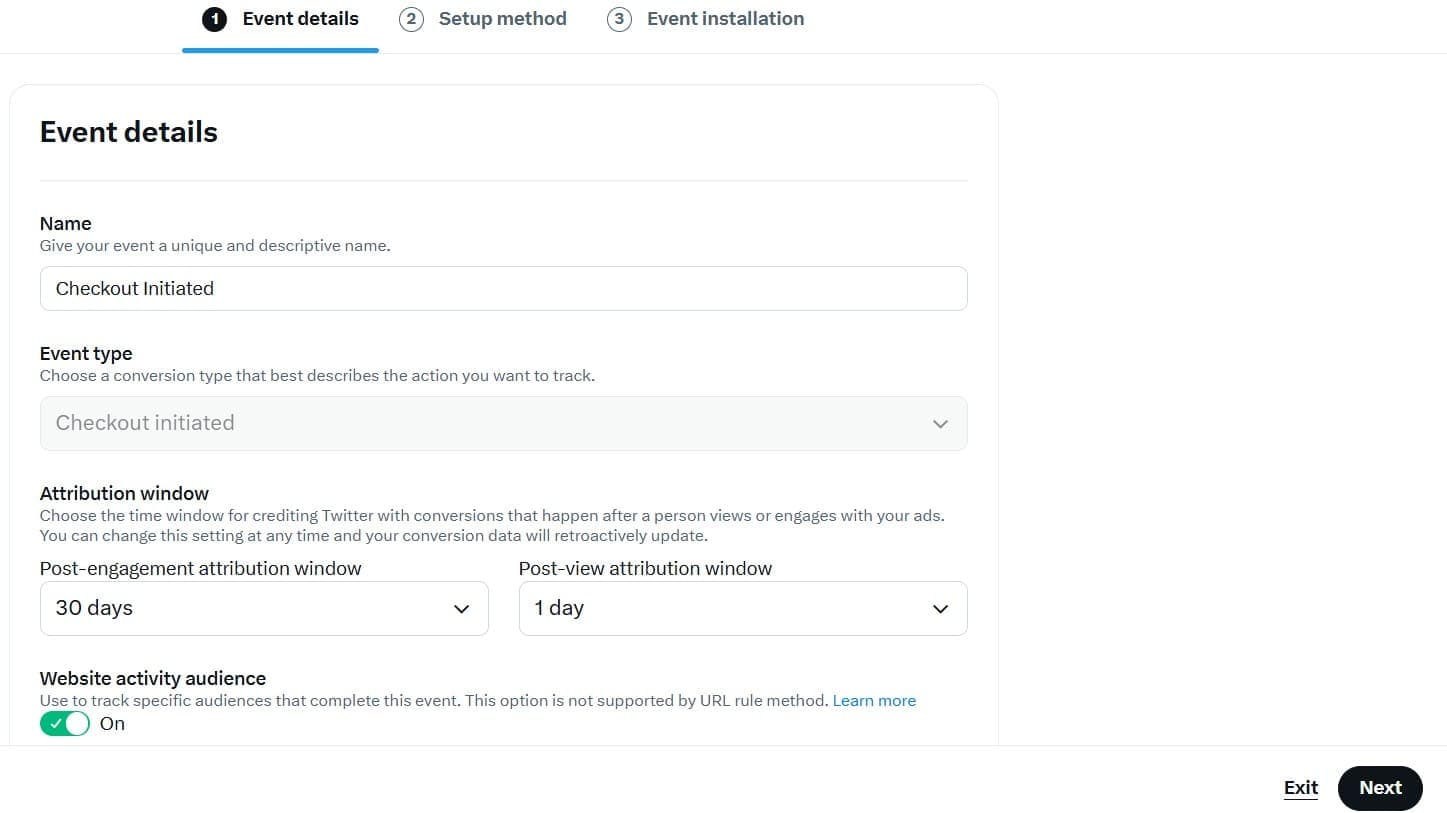
- On the Event Details screen, enter the name "Checkout Initiated" for the event. Choose Checkout initiated from the Event Type dropdown. Leave the attribution window as is, and keep Website activity audience toggled on.
- Click Next.
- Set the Setup Method to Define Event with Code. Click Next.

- In the Event Installation section, select the Install with Tag Manager tab and copy the Event ID. You will need this when adding the event to Google Tag Manager.
-
Create the Twitter Base Pixel Tag
- Go to your GTM dashboard, click on Tags, then click New to create a new tag.
- Name the tag "Twitter Base Pixel."
- Choose Tag Configuration and click on Community Template Gallery.
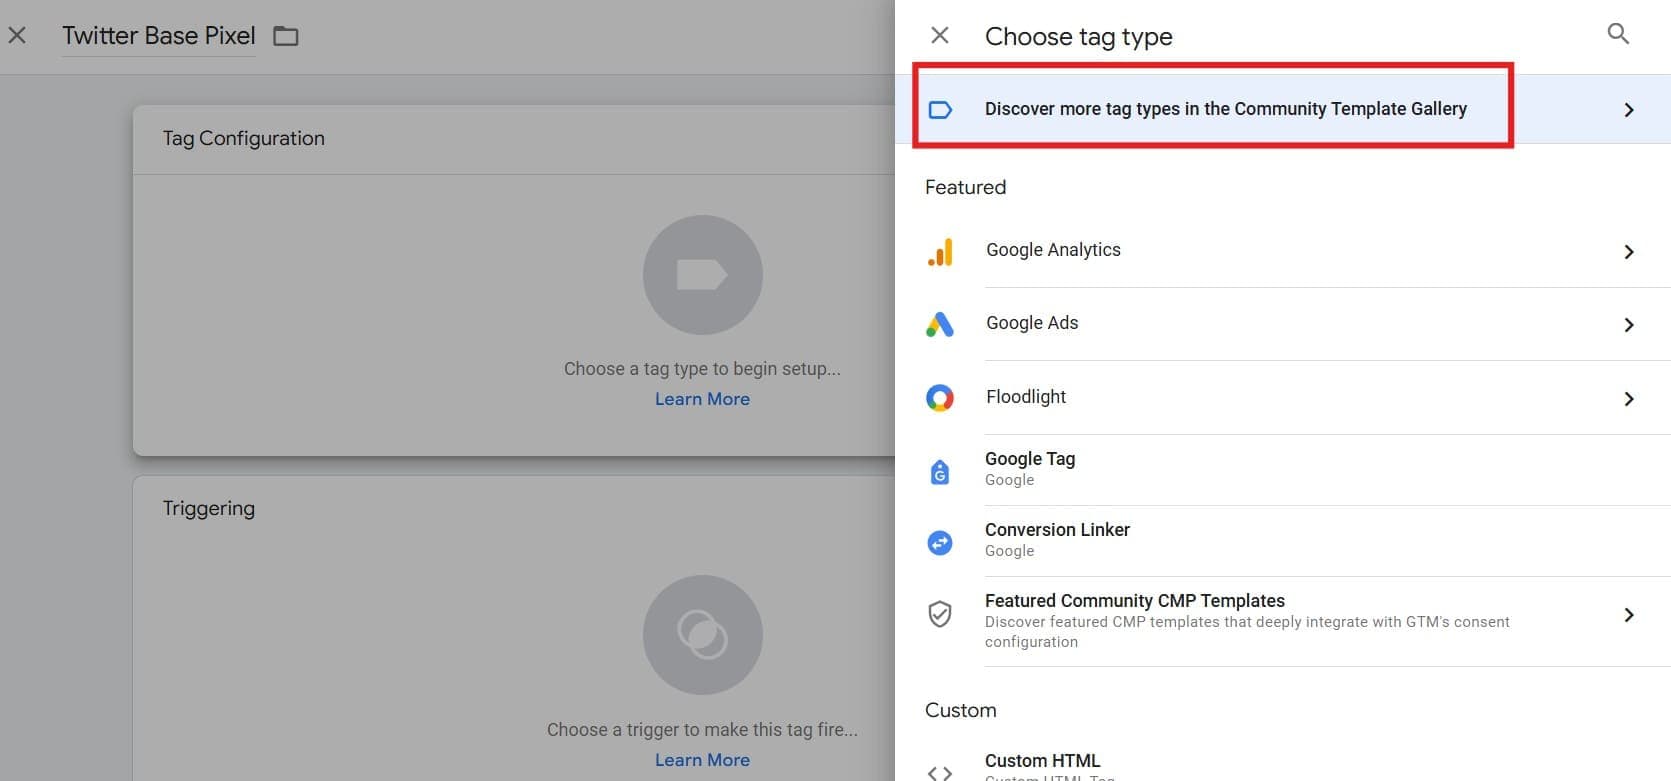
- Search for "Twitter Base Pixel" and click on it.
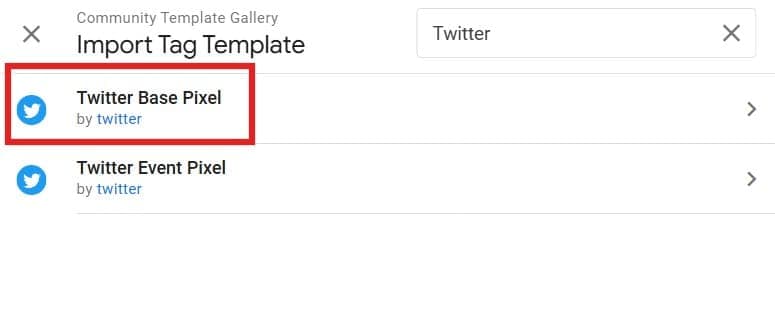
- Click on Add to Workspace.
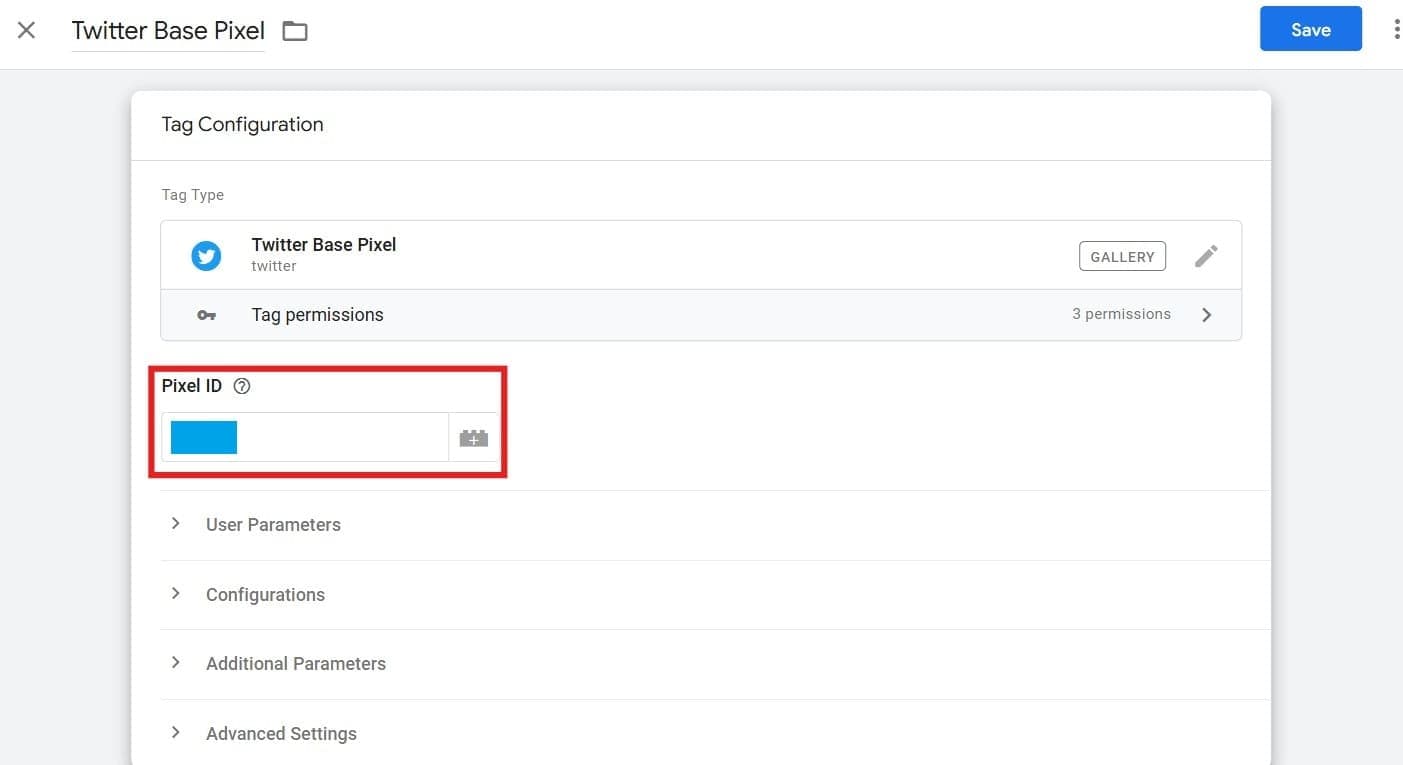
- Paste the Twitter Pixel ID you copied earlier into the "Pixel ID" field.
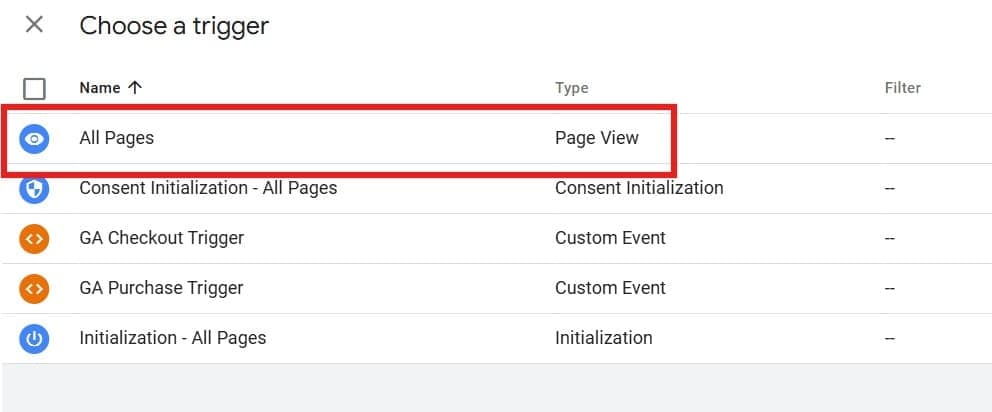
- Go to Triggering and set the trigger to All Pages to fire this tag across all pages.
- Save the tag.
-
Create Variables for Purchase and Checkout Initiated Events
- Go to your GTM dashboard, click on Variables, then click New to create a new user-defined variable.
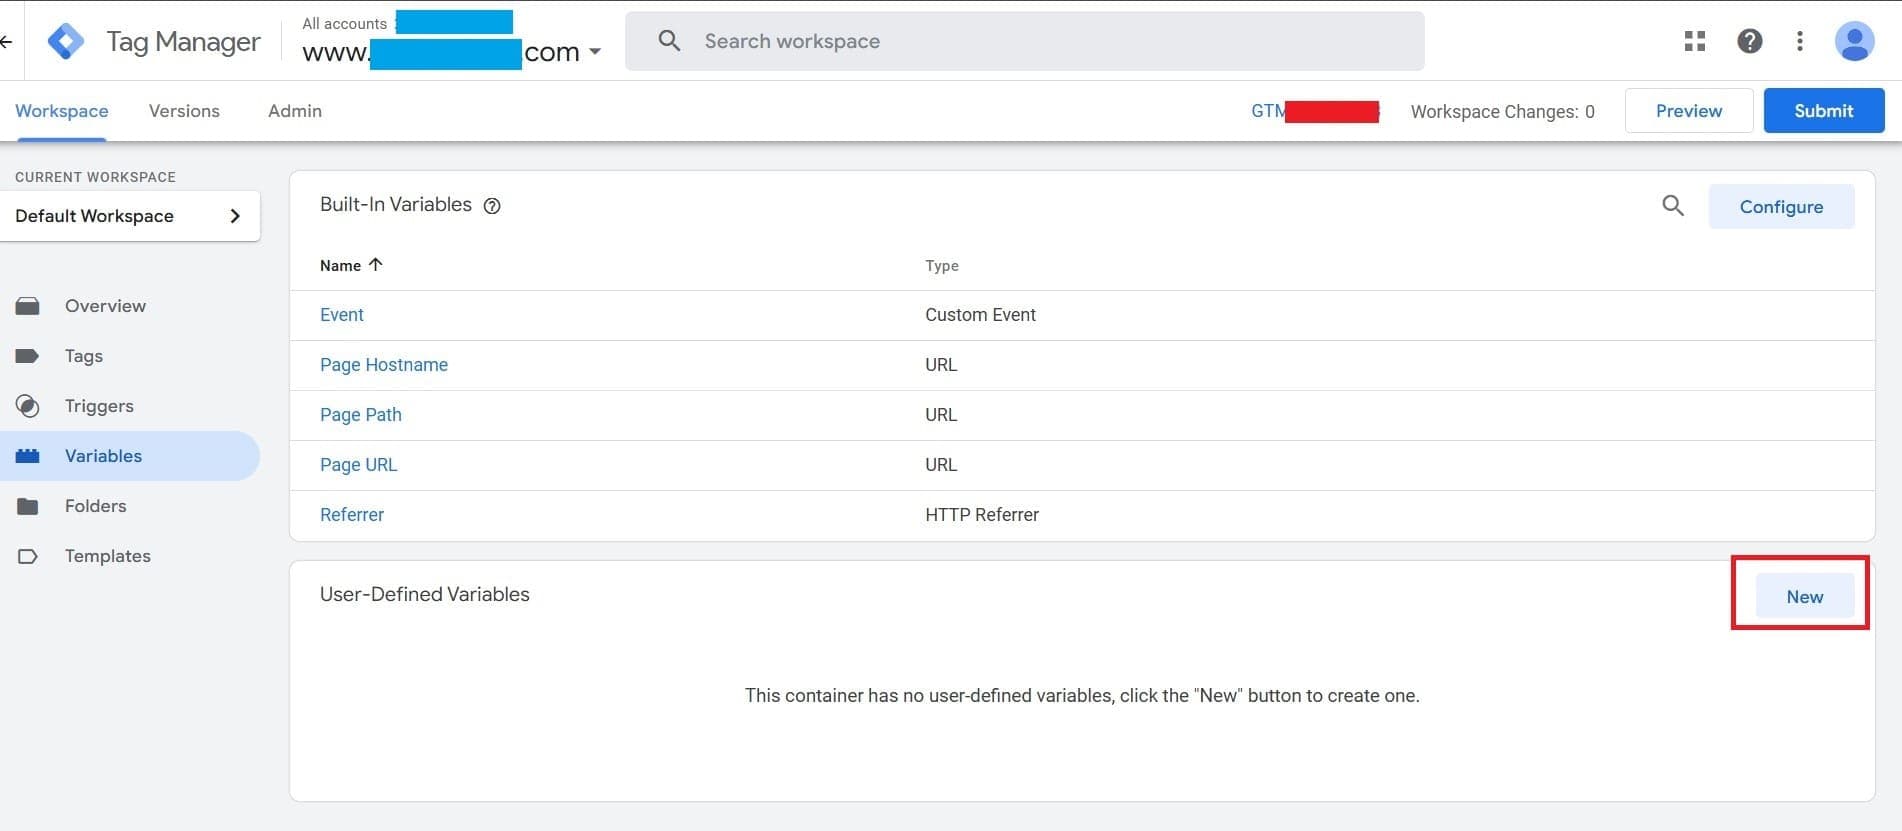
- Name the variable
twitter.currency. - Choose Variable Configuration and select Data Layer Variable.
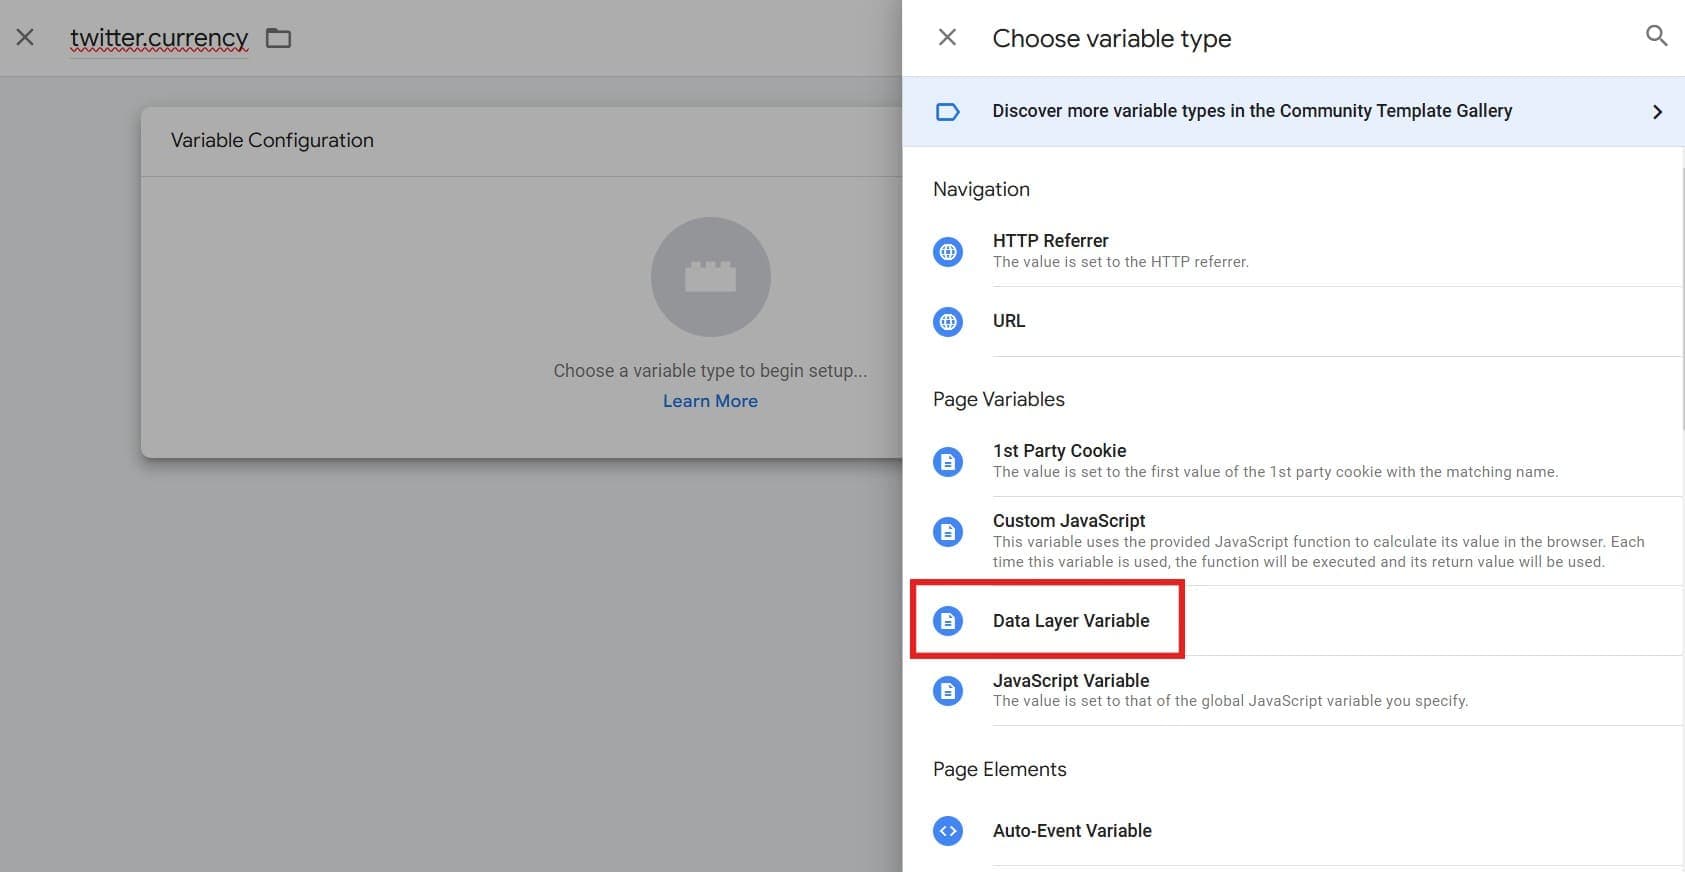
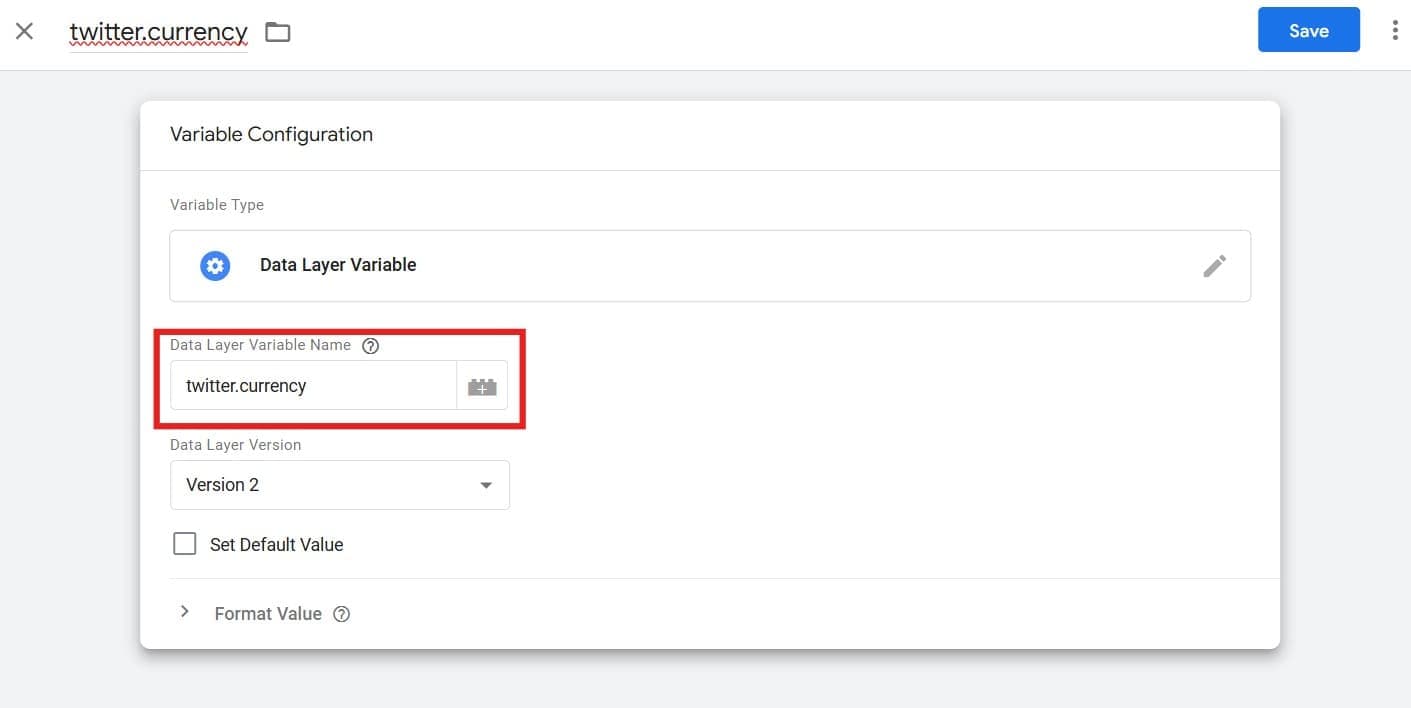
- In the "Data Layer Variable Name" field, enter
twitter.currency. Ensure that the Data Layer Version is set to Version 2, then click Save.
- Repeat the above steps to create two additional variables:
twitter.transaction_idtwitter.value

- Now, you have three variables:
twitter.currency,twitter.transaction_id, andtwitter.value. These variables will be used to send data from StartupBolt to Twitter. StartupBolt will use:twitter.valueto send the product price,twitter.transaction_idto send the transaction ID of the sale,- and
twitter.currencyto send the currency of the transaction.
-
Create Triggers for Purchase and Checkout Initiated Events
- Go to your GTM dashboard, click on Triggers, then click New to create a new trigger.
- Name the trigger "X Purchase Trigger."
- Choose Trigger Configuration and select Custom Event.
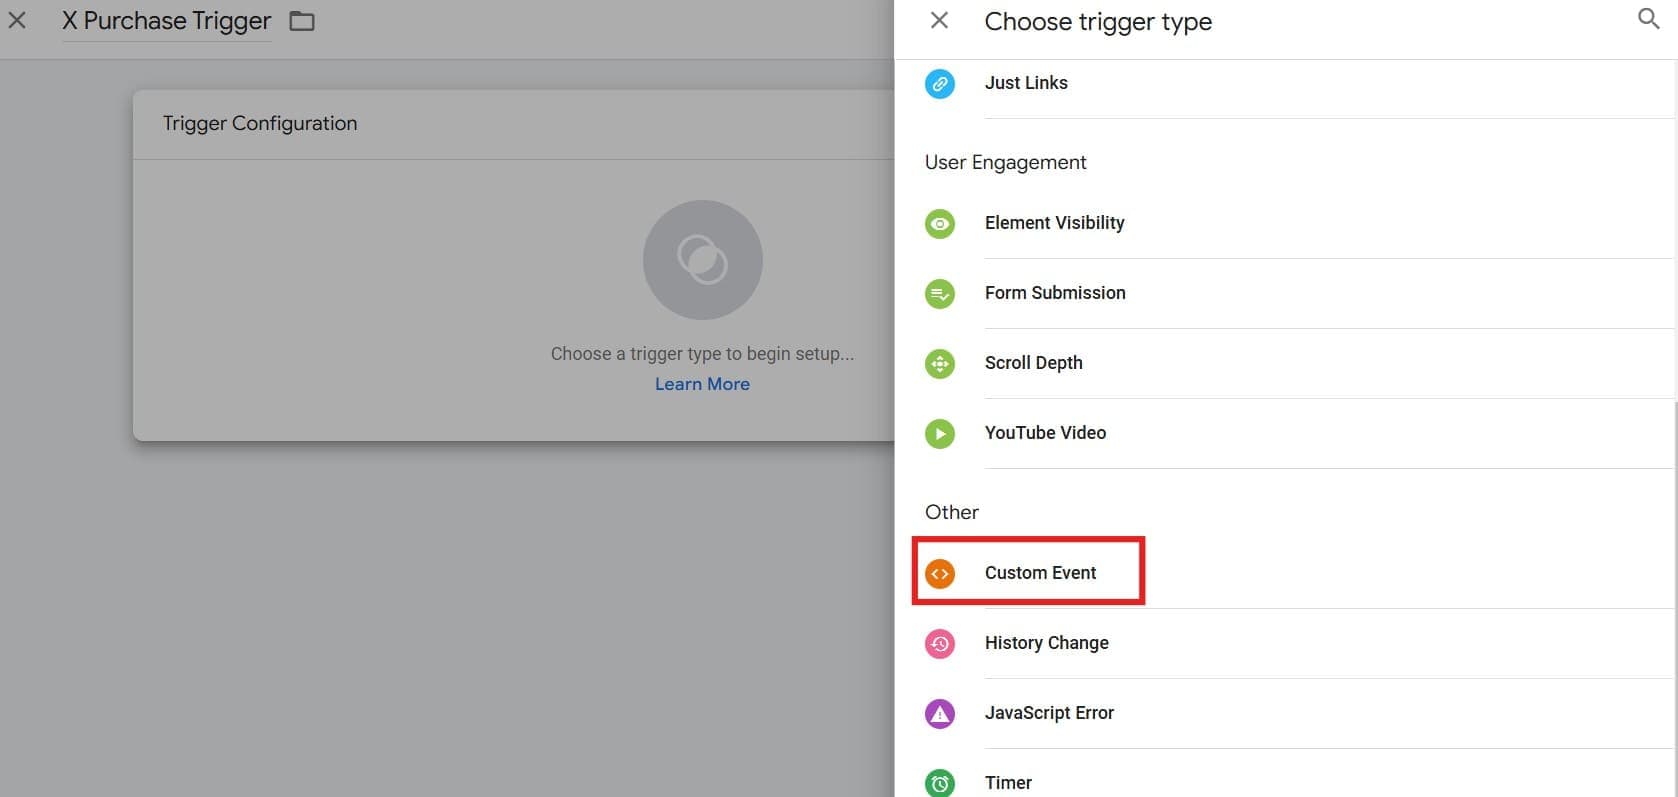
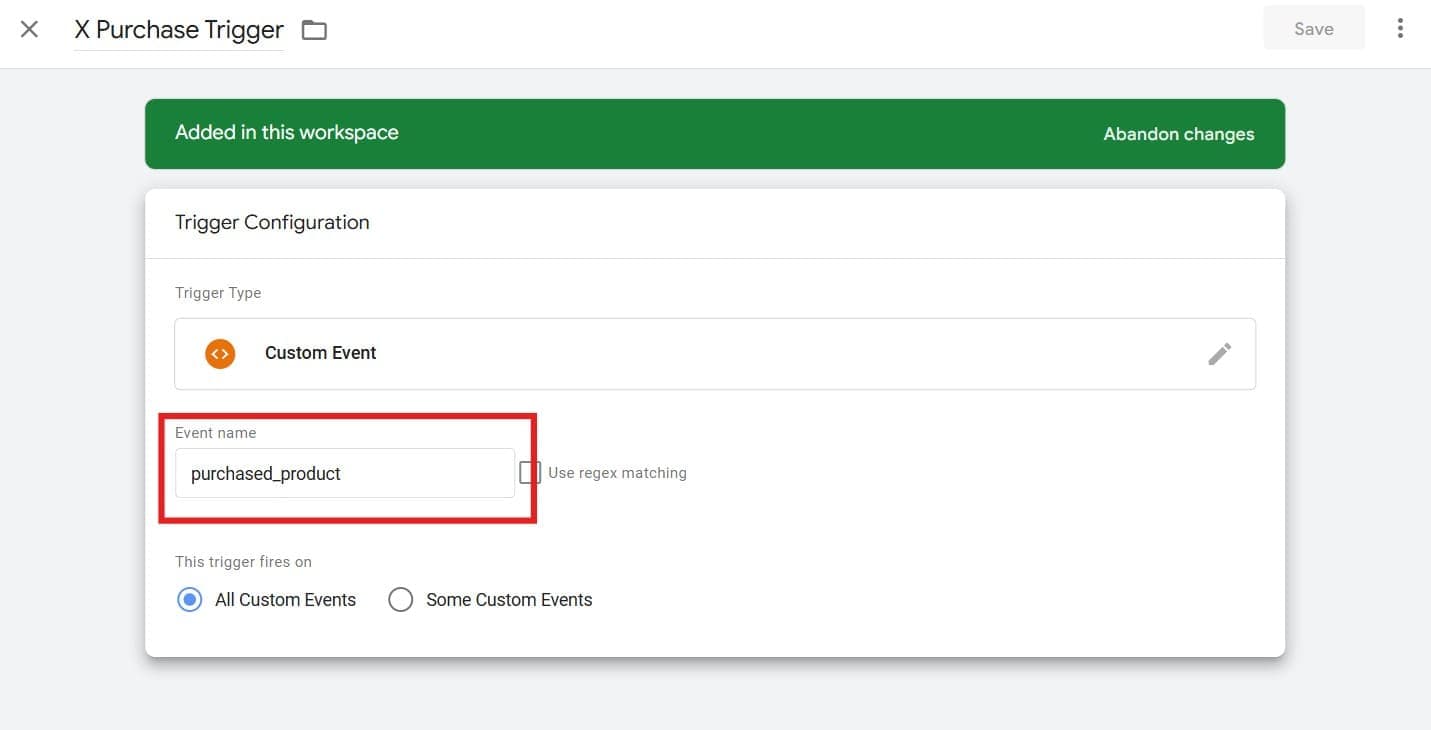
- In the "Event Name" field, enter
purchased_product. Ensure "This trigger fires on" is set to "All Custom Events," then click Save.
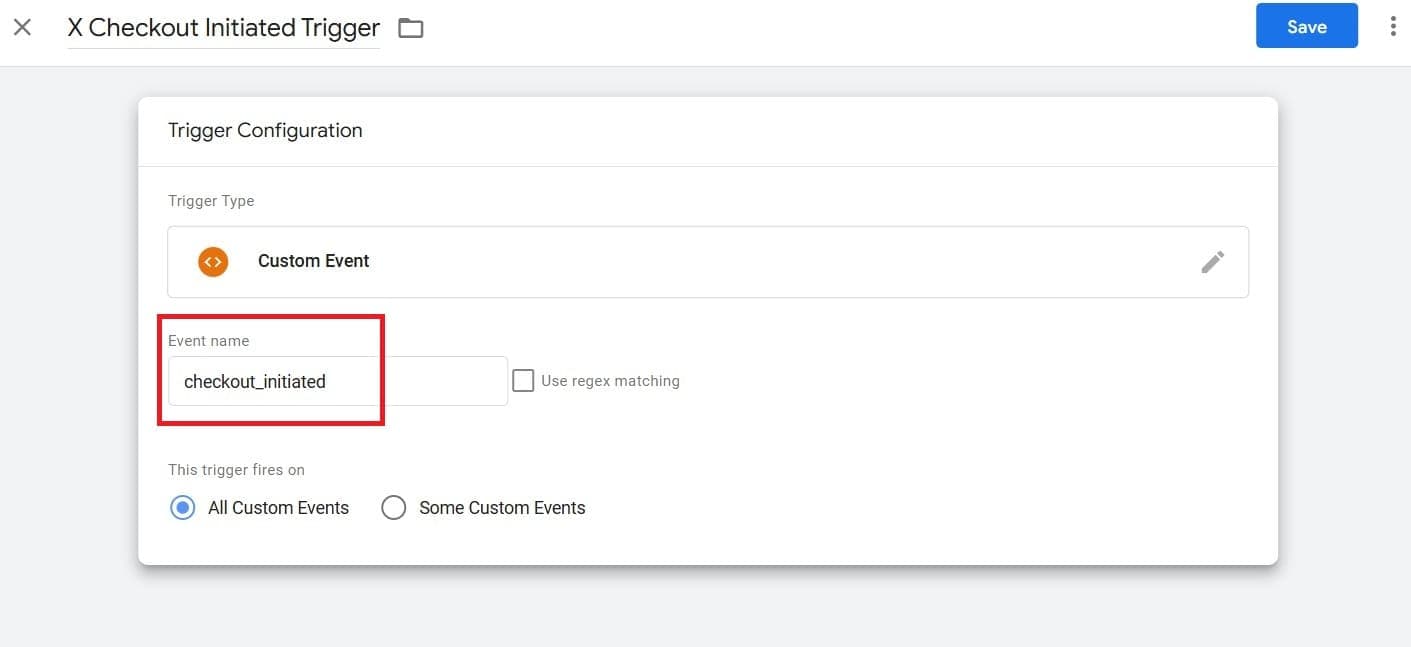
- Repeat the above steps to create another trigger. Name this trigger "X Checkout Initiated Trigger."
- In the "Event Name" field, enter
checkout_initiated. Ensure the remaining settings are the same, then click Save.
-
Create the Twitter Event Pixel - Purchase Tag
- Go to your GTM dashboard, click on Tags, then click New to create a new tag.
- Name the tag "Twitter Event Pixel - Purchase."
- Choose Tag Configuration and click on Community Template Gallery.
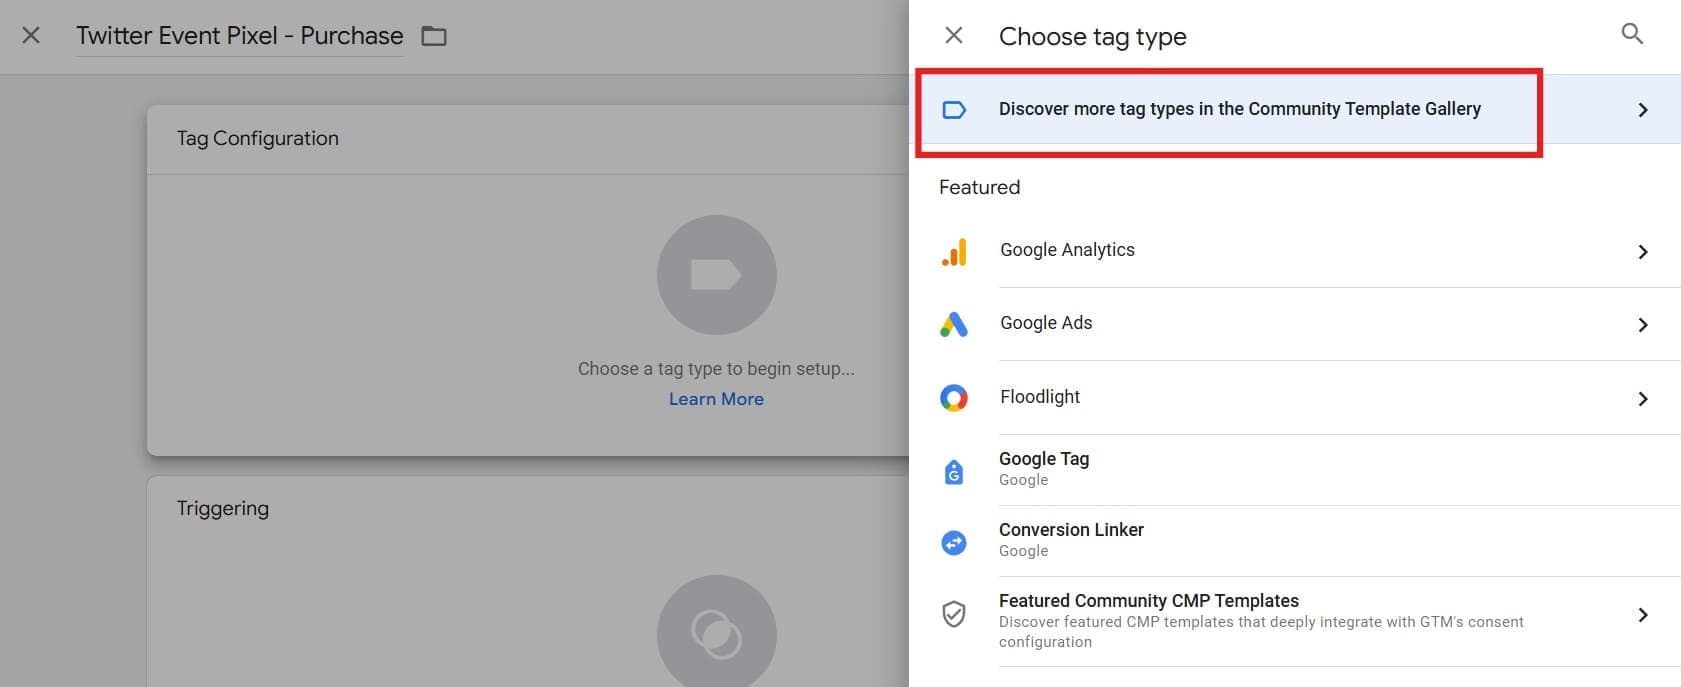
- Search for "Twitter Event Pixel" and click on it.
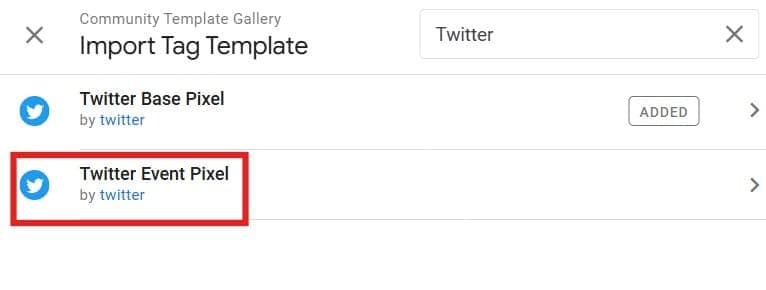
- Click on Add to Workspace.
- Paste the Twitter Event ID you copied earlier when you created the Purchase Event in X into the "Event ID" field.
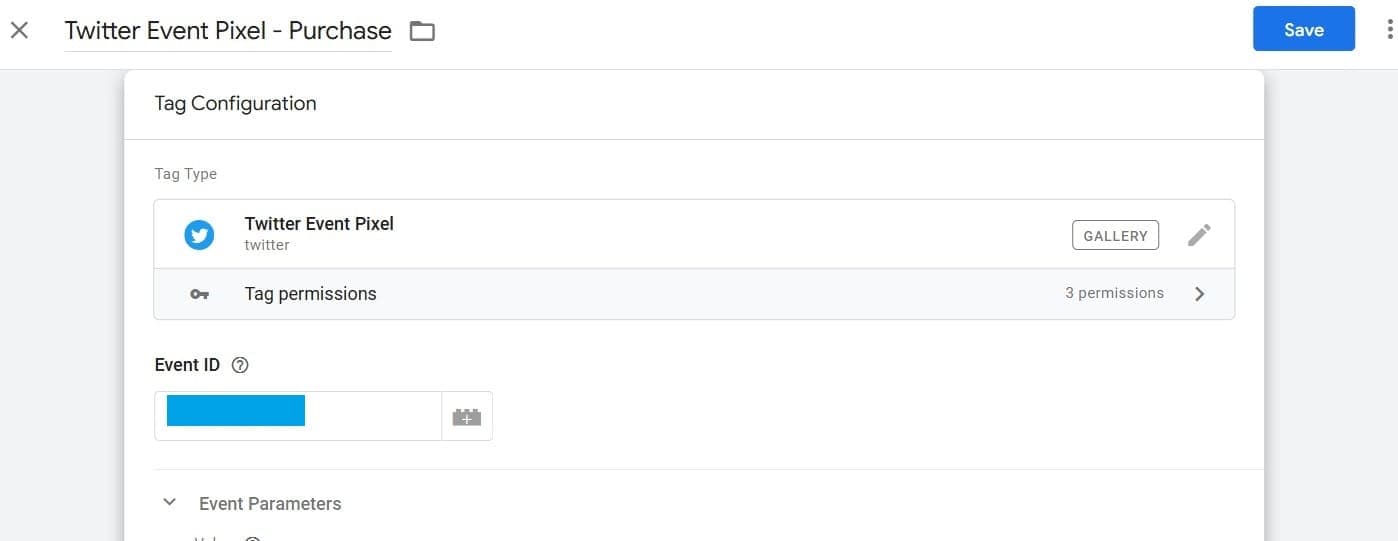
- In Event Parameters, set:
- Value as
{{twitter.value}} - Currency as
{{twitter.currency}} - Conversion ID as
{{twitter.transaction_id}}
- Value as
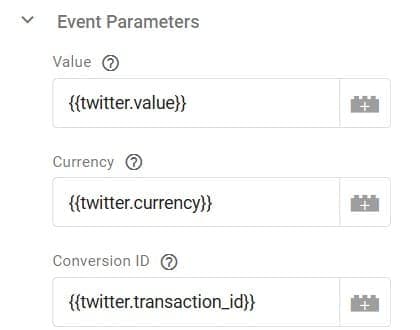
- Go to Triggering and set the trigger to X Purchase Trigger to fire this tag when a purchase occurs.
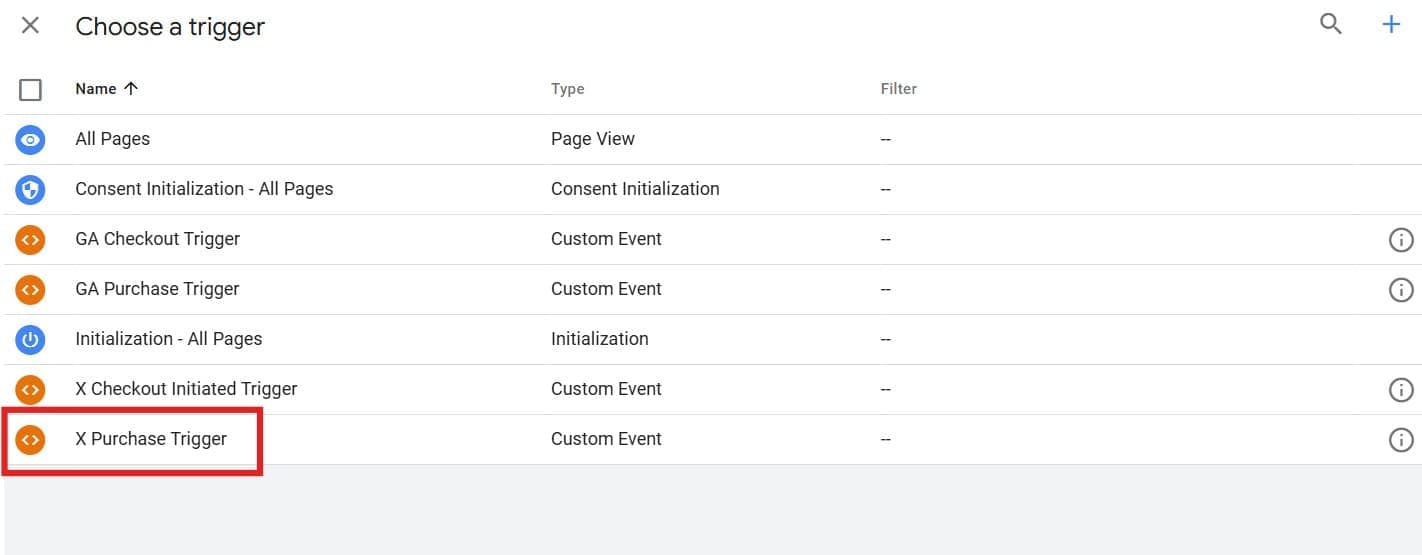
- Save the tag.
-
Create the Twitter Event Pixel - Checkout Initiated Tag
- Go to your GTM dashboard, click on Tags, then click New to create a new tag.
- Name the tag "Twitter Event Pixel - Checkout Initiated."
- Choose Tag Configuration and click on Community Template Gallery just like before.
- Search for "Twitter Event Pixel" and click on it.
- Click on Choose Template.
- Paste the Twitter Event ID you copied earlier when you created the Checkout Initiated Event in X into the "Event ID" field.
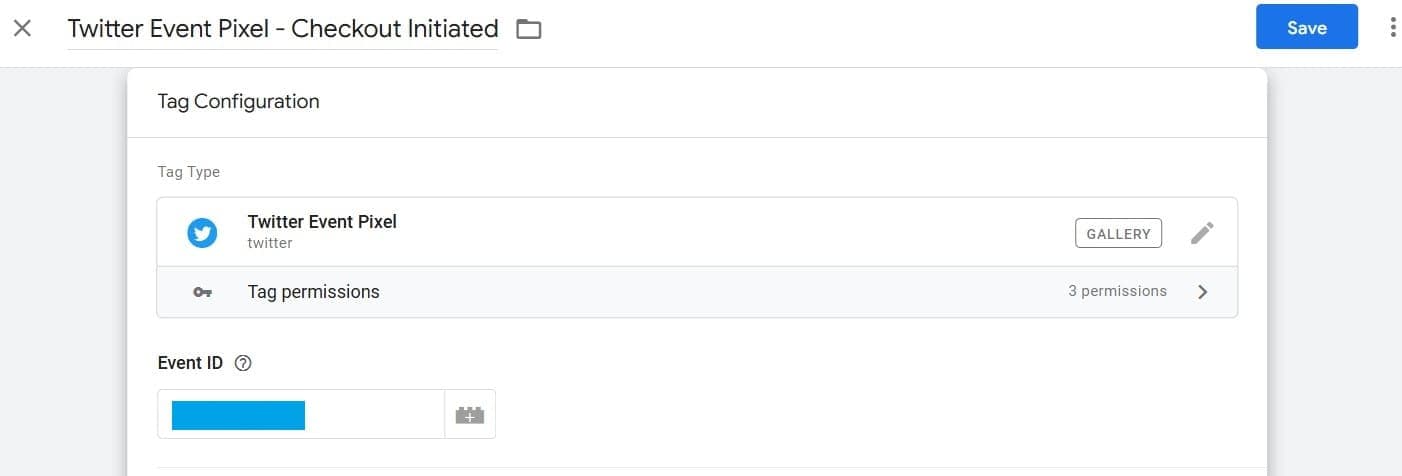
- In Event Parameters, set:
- Value as
{{twitter.value}} - Currency as
{{twitter.currency}}
- Value as
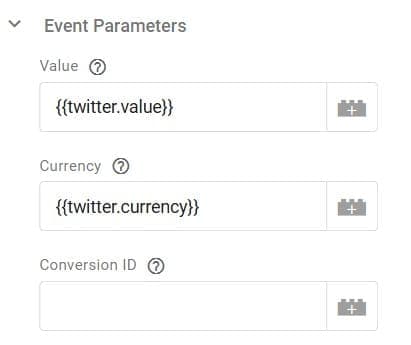
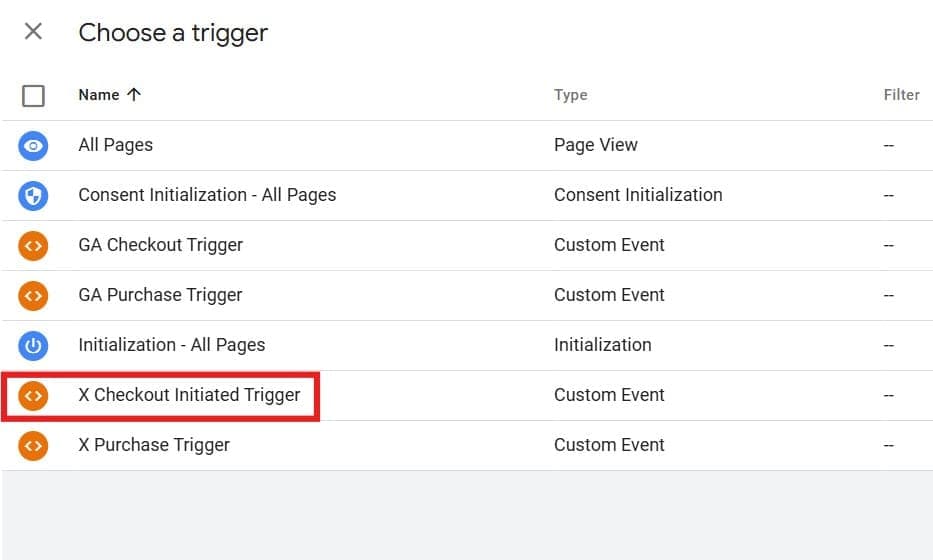
- Go to Triggering and set the trigger to X Checkout Initiated Trigger to fire this tag when the checkout is initiated.
- Save the tag.
-
Publish Your Changes
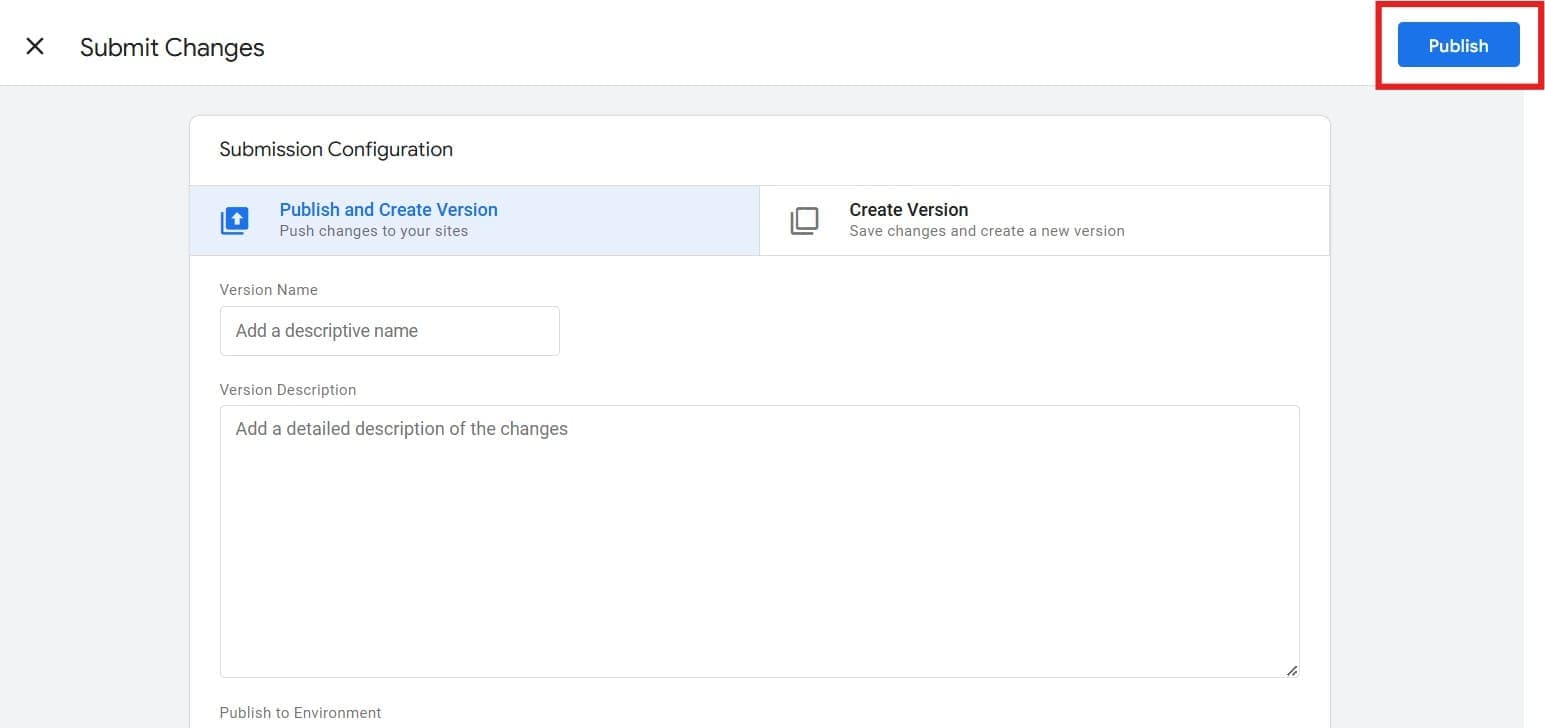
- Click Submit in GTM, then click Publish to apply the changes to your website.
-
Enable X Ads
- Open the
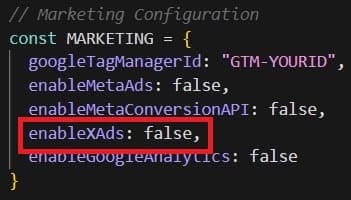
/settings.jsfile located in the root directory of your project. This is the central configuration file for your StartupBolt application, containing various settings that control different aspects of your web app. - Set the value of
enableXAdsunder theMARKETINGobject totrue. It is set tofalseby default.
- Preview the GA Events Setup in GTM
- Ensure your website is running locally by typing
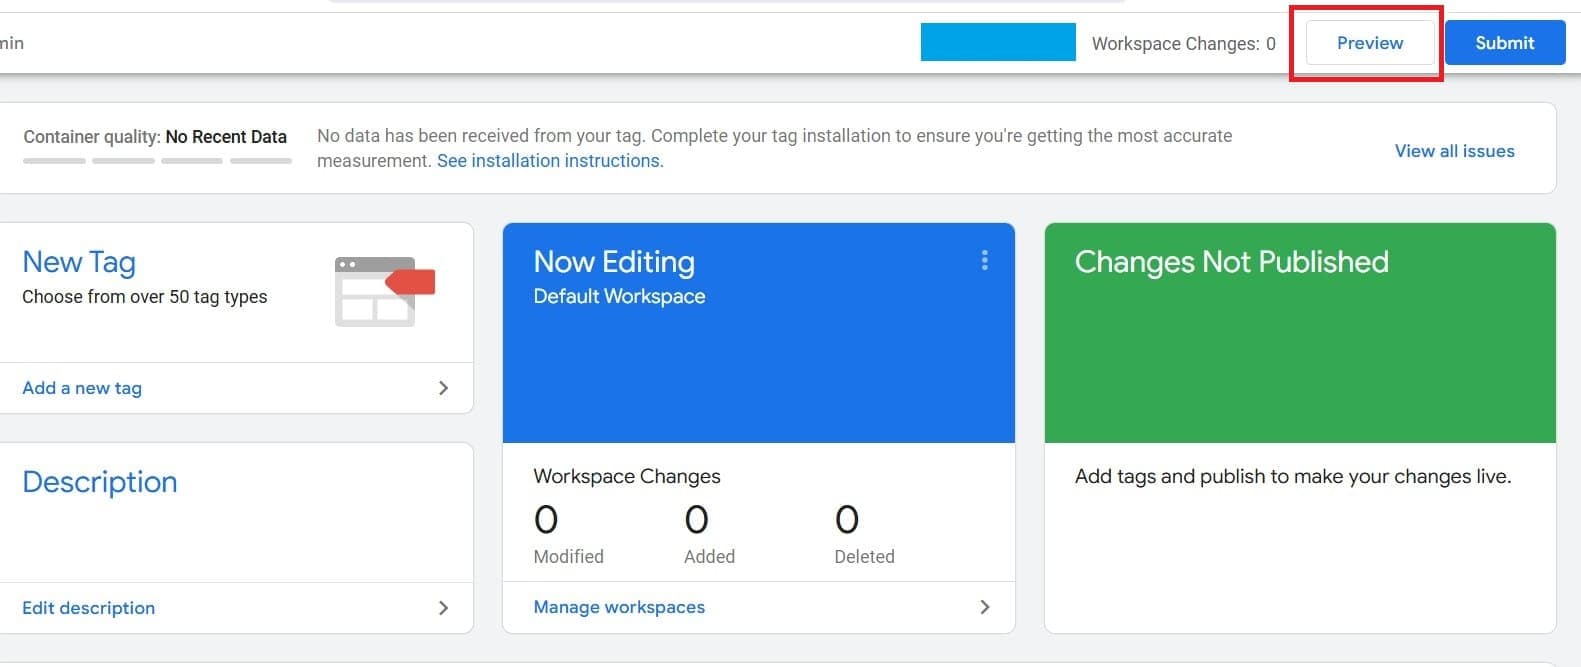
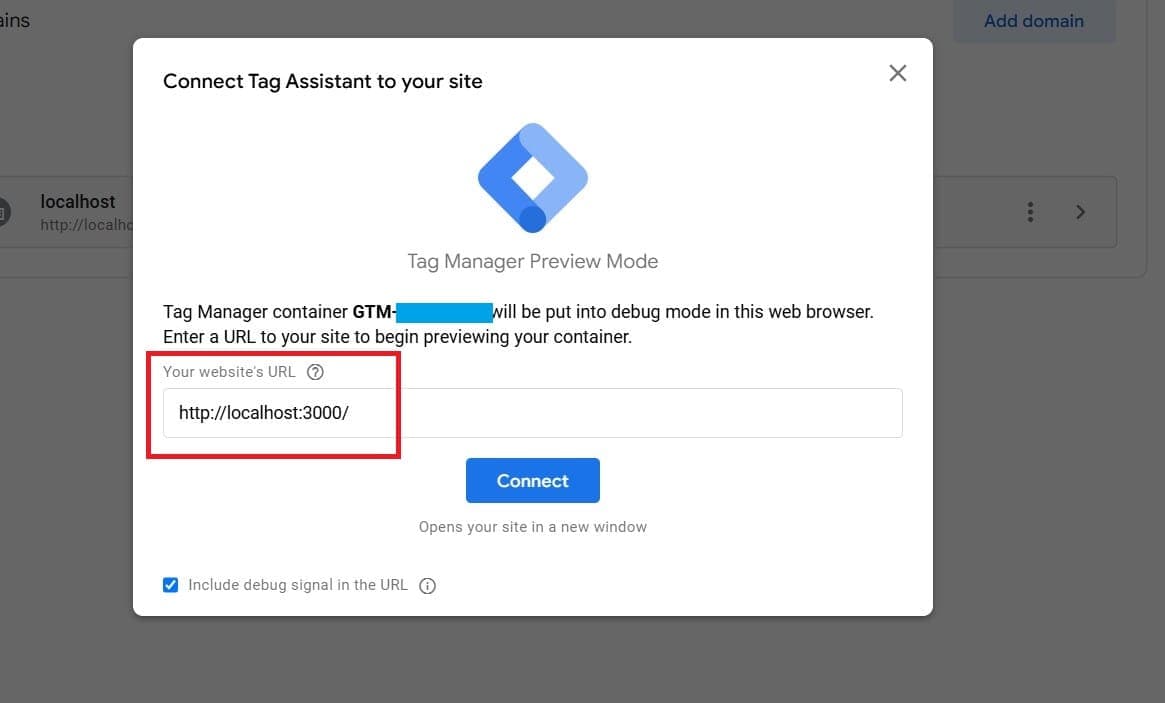
npm run devin your terminal. The site should be accessible athttp://localhost:3000. If port 3000 is unavailable, it might use another port like 3001, 3002, etc. - Next, go to the GTM dashboard and click on the "Preview" button.
- Enter your local website URL (e.g.,
http://localhost:3000) and click "Connect."
- If everything is set up correctly, you will see the "Twitter Base Pixel firing". And you will see "Twitter Event Pixel - Purchase" and "Twitter Event Pixel - Checkout Initiated" listed, but they will not fire yet since you haven’t initiated a checkout or made a purchase. This still indicates that the setup is working as expected.

- To test if the tags fire, click on the buy button if you have one on your website. For more details, check the Stripe Integration section or the LemonSqueezy Integration section. In test mode, click the buy button; you should see the GA Checkout Tag fire, and if you complete a purchase, you should see the GA Purchase Tag fire.
- You can also verify if the tags are firing by visiting your deployed website (e.g.,
www.yourdomain.com). Make sure your website is deployed; visit the Deployment section if you haven't deployed your site yet.
Congratulations! You have successfully set up conversion tracking for X Ads using the Twitter Base and Event Pixel. You can now run ads and monitor their performance effectively.