Google Tag Manager
Google Tag Manager (GTM) simplifies the management of marketing and analytics tags on your website. It eliminates the need to manually update code on your site; you can manage and deploy tags directly from the GTM interface. This guide walks you through the setup process.
Steps to Set Up GTM
-
Login to GTM and Create an Account
- Visit the Google Tag Manager (opens in a new tab) website and log in with your Google account.
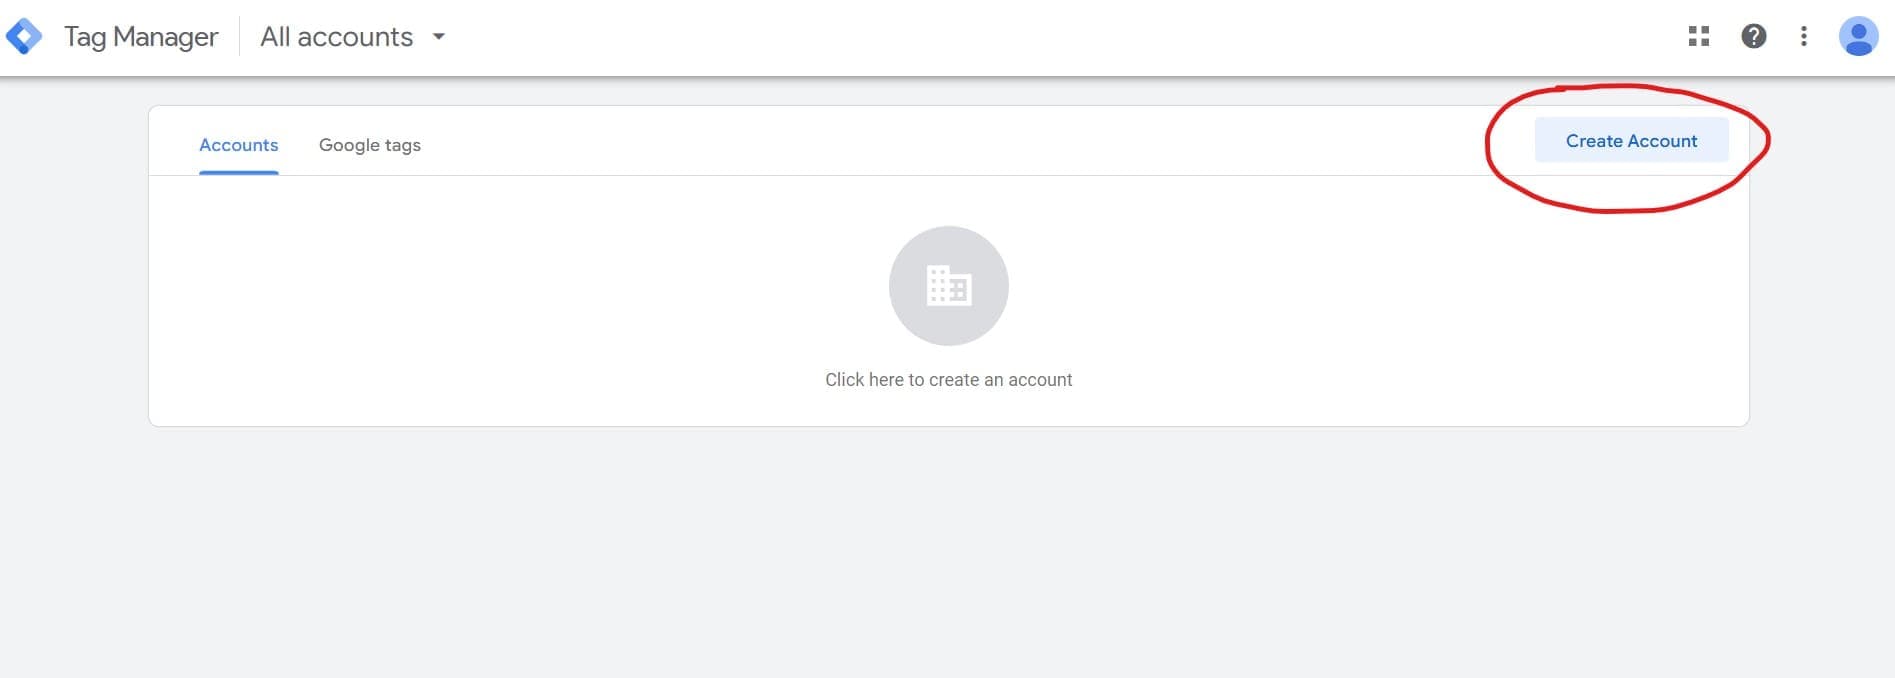
- Click the "Create Account" button.

- Enter an account name, container name, and select "Web" as the target platform.

- Click the "Create" button to set up the account.
-
Add the GTM ID to Your Project
- Once the account is created, you'll receive a GTM ID (e.g., GTM-XXXXXXX). Copy this ID.

- Open the
/settings.jsfile located in the root directory of your project. This is the central configuration file for your StartupBolt application, containing various settings that control different aspects of your web app. - Paste the GTM ID as the value for
googleTagManagerIdunder theMARKETINGobject.

-
Preview and Test GTM Setup
- Ensure your website is running locally by typing
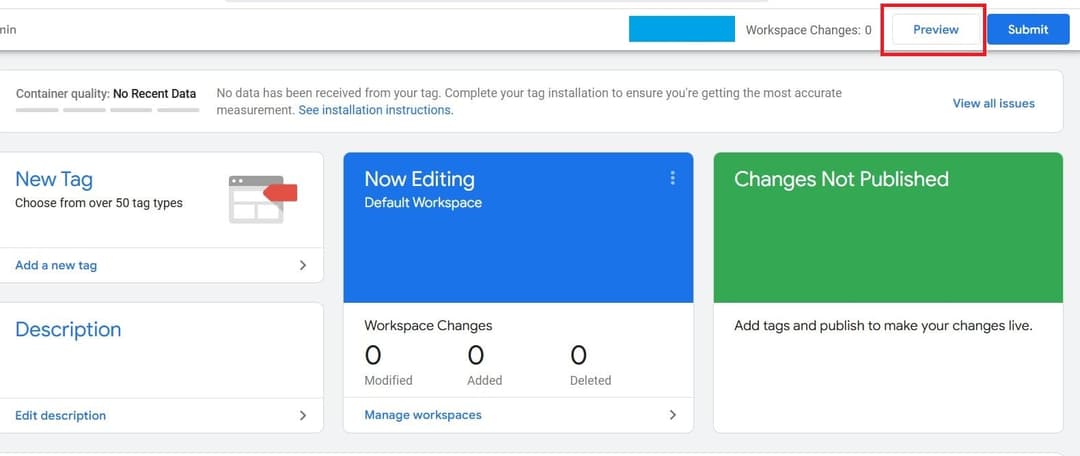
npm run devin your terminal. The site should be accessible athttp://localhost:3000. If port 3000 is unavailable, it might use another port like 3001, 3002, etc. - Next, go to the GTM dashboard and click on the "Preview" button.

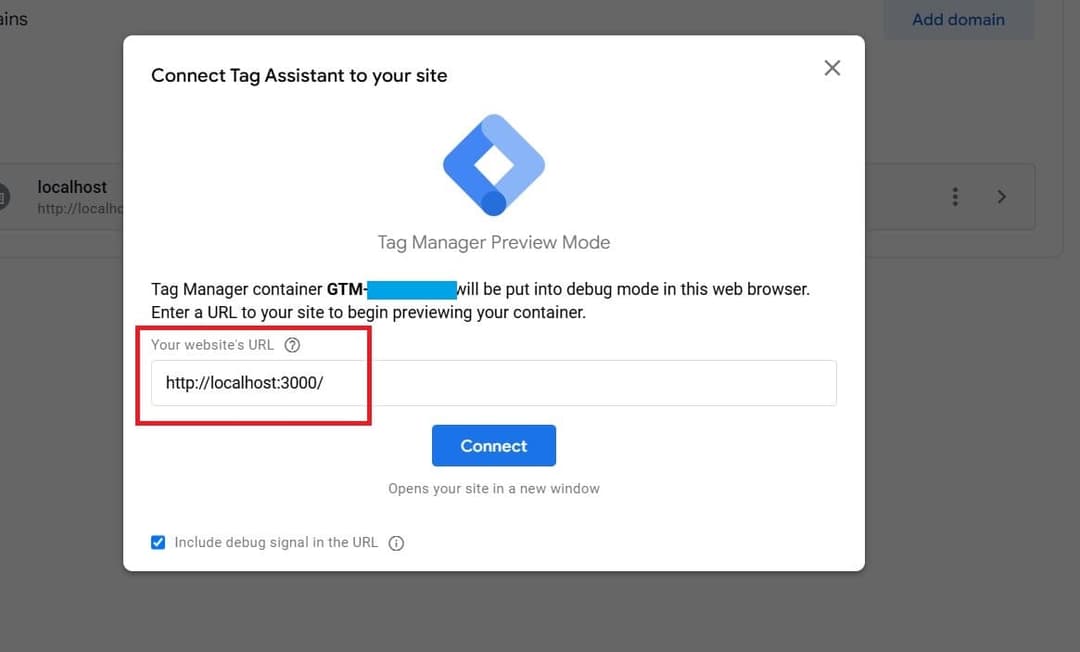
- Enter your local website URL (e.g.,
http://localhost:3000) and click "Connect."

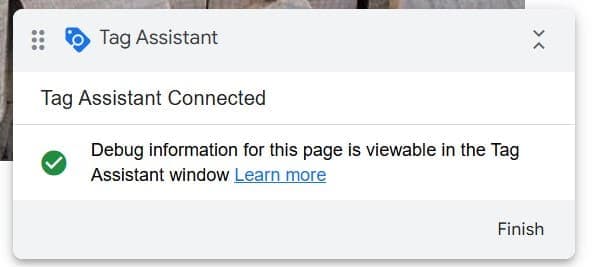
- If everything is set up correctly, the Tag Assistant will indicate that it is connected. This confirms that GTM is properly integrated.

- Ensure your website is running locally by typing
Now, let's proceed to set up analytics so you can monitor and visualize your website's performance effectively.