Stripe Payment Setup Guide
Overview
This guide provides a detailed walkthrough for setting up Stripe payments in your application. It covers everything from account creation to webhook configuration, ensuring a smooth integration process for both test and live environments.
Table of Contents
- Set Up Stripe Account
- Create Product
- Webhook and Stripe Environment Variables Setup
- Supabase Environment Variables Setup
- Payment Settings in settings.js
Set Up Stripe Account
-
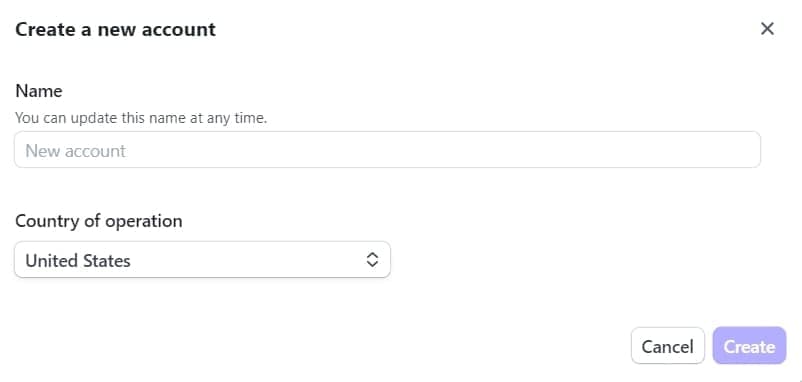
Sign up for Stripe
- Begin by signing up on Stripe and creating a new account. Provide your business name and country of operation.
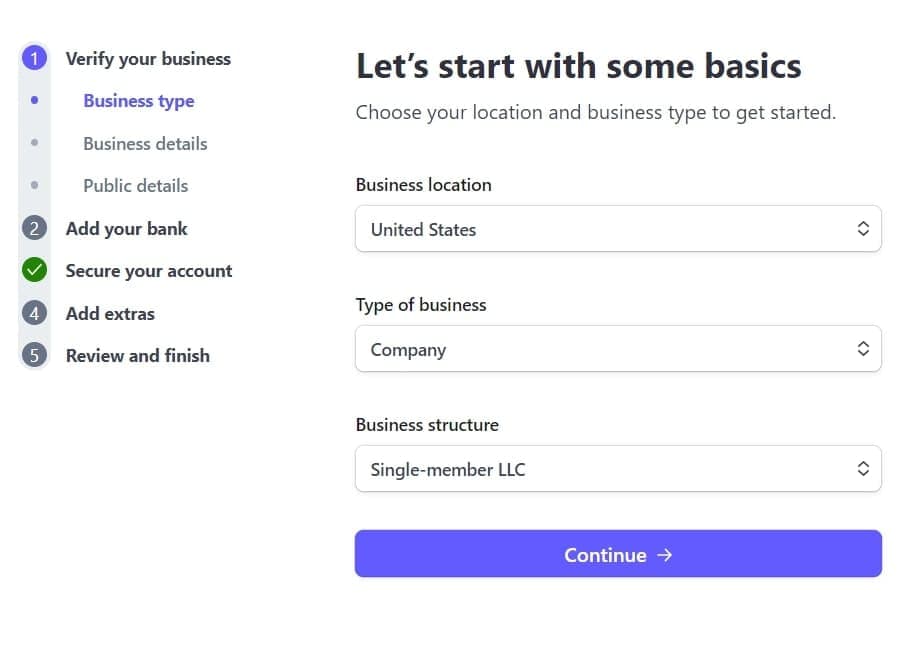
- If you don’t have a legal business yet, many users operate using a Single Member LLC in the USA. You can use Firstbase.io (opens in a new tab) to register your business in the US. (Recommendation only; please do your own research.)
-
Complete Your Profile
- Fill out your profile details in Stripe, including bank payout information. When setting up payouts, you can choose a schedule that suits your needs (e.g., weekly on Mondays).
-
Account Verification
- The approval and verification process for your Stripe account might take a few days. For subsequent accounts, approvals are generally faster since your identity and details are already in Stripe's system.
- Do I Need a New Stripe Account for Every Startup?
- No, creating a new Stripe account for each startup is not mandatory. You have two options based on your requirements:
-
Single Account for Multiple Startups
- You can manage multiple startups under one Stripe account.
- Payments from all startups will be deposited into the same bank account.
- You can use the logo and branding of your parent company across all your startups.
- Ideal for centralized financial management and when your startups operate under the same legal entity.
-
Separate Accounts for Each Startup
- If you want distinct branding (logos, business names, etc.) for each startup, or need payments routed to separate bank accounts, you’ll need to create individual Stripe accounts for each.
- Customers will see unique business names on their statements, reducing confusion.
- Recommended for startups with different legal entities or distinct operational goals.
-
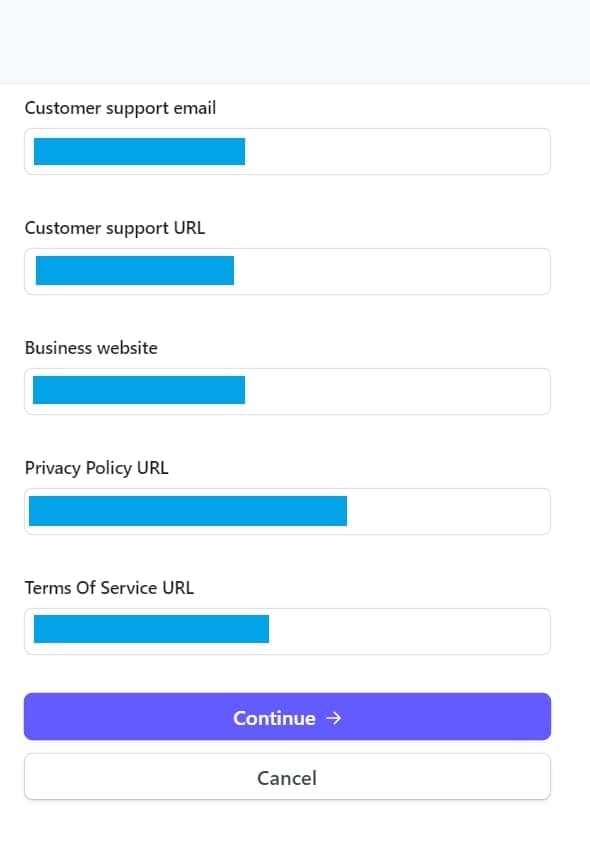
Public Business Details
- Navigate to Settings > Business > Public details
- Fill in customer support email, customer support URL, website URL, privacy policy URL, and terms of service URL.
-
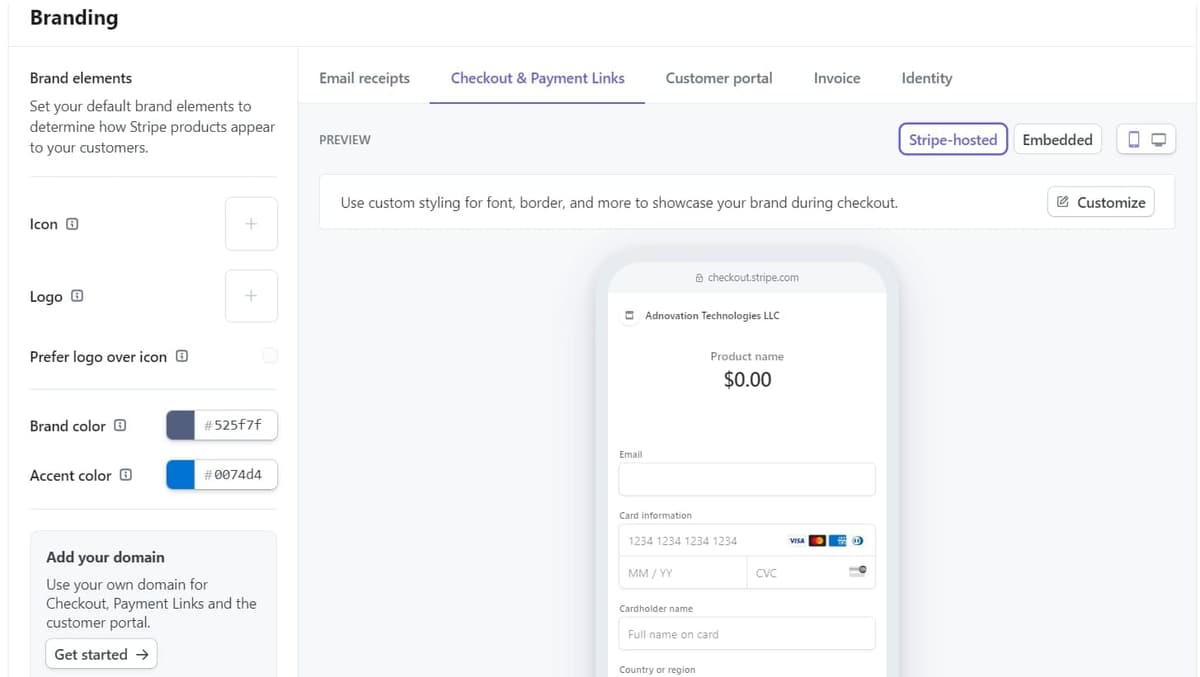
Branding
- Customize your branding by going to Settings > Business > Branding.
- Add your company icon and logo.
- Ensure the logo and icon have transparent backgrounds to look professional across various Stripe-hosted pages.
- Set your brand and accent colors to match your website.
-
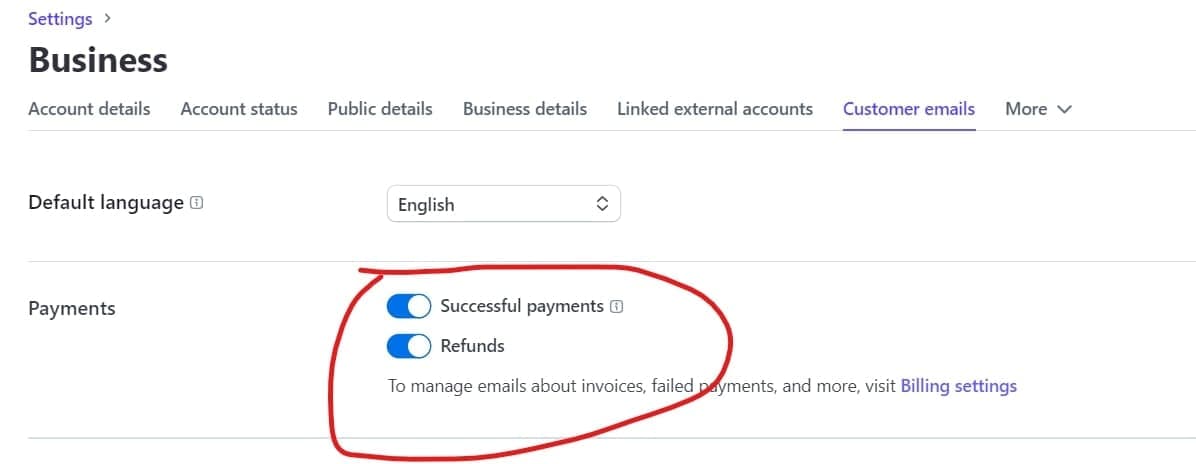
Customer Emails
- In Settings > Business > Customer emails, enable emails for successful payments & refunds.
-
Subscriptions and Emails
- Under Settings -> Billing -> Subscriptions and Emails, select "Send emails about upcoming renewals" and "Send emails about expiring cards".
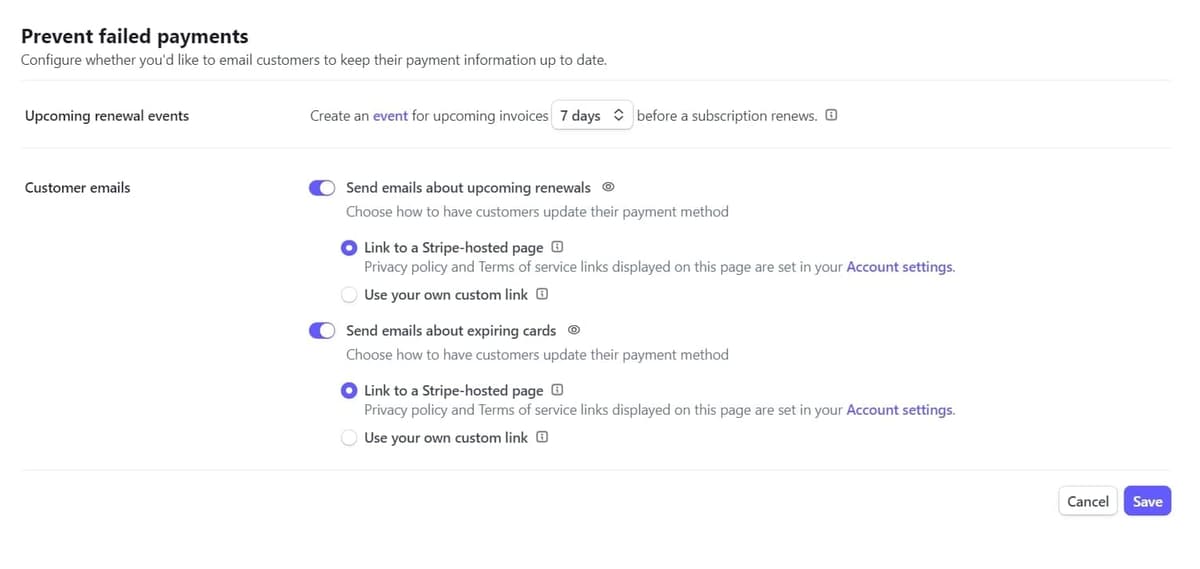
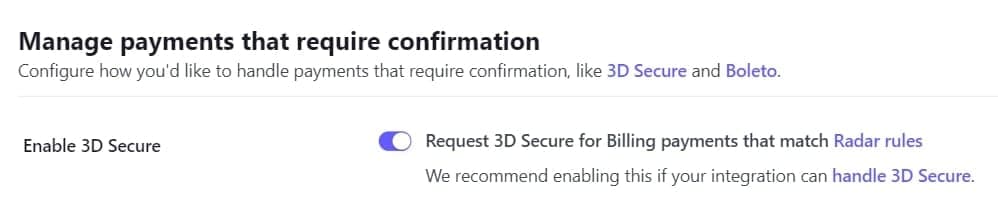
- Optionally, it is recommended to enable 3D Secure for billing payments that match Radar rules.
-
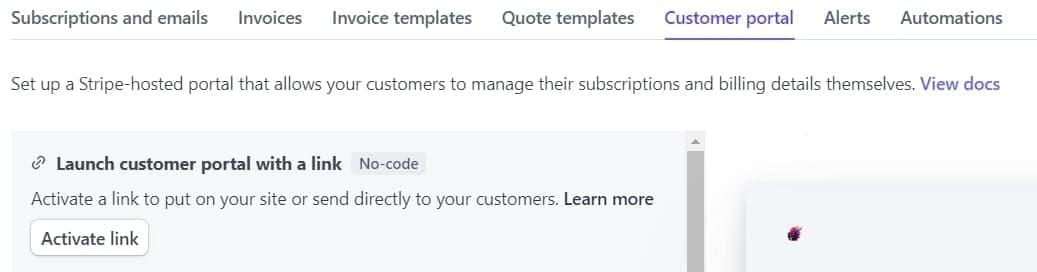
Customer Portal
- Activate the Customer Portal by going to Settings > Billing > Customer Portal.
- Click on "Activate Link"
- Customer Portal activation must be repeated separately for both test and live modes since the activation is independent for each environment.
-
Fraud Prevention
- Go to Settings > Radar and enable Radar for Fraud Teams. This is recommended to prevent fraudulent transactions, though it may slightly reduce conversion rates. Radar services will cost a few cents per transaction.

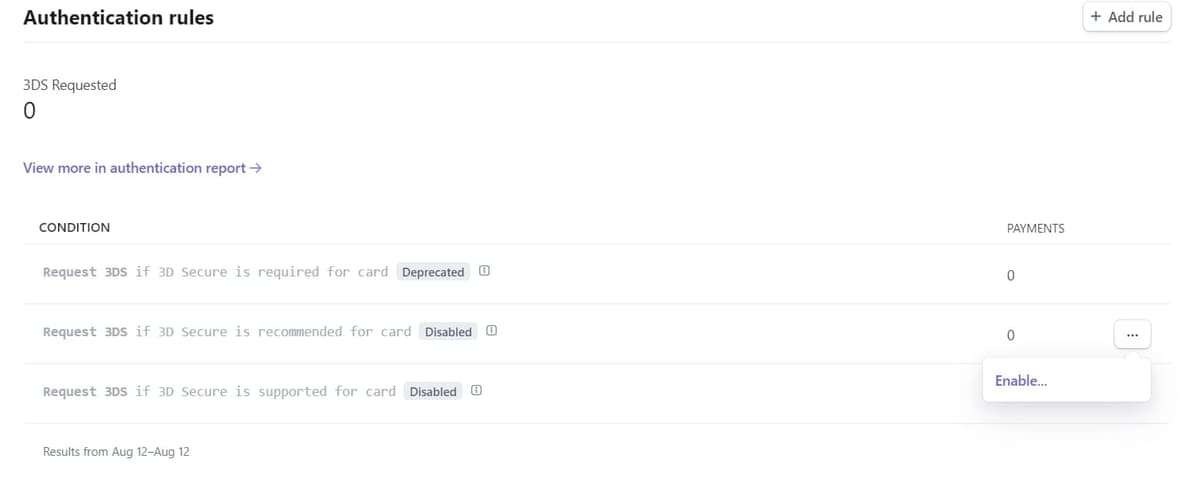
- Additionally, under Radar > Rules, you can enable the recommended 3D Secure rules:
- First Rule: Request 3DS if 3D Secure is recommended for card. Enabling this rule is advisable.
- Second Rule: Request 3DS if 3D Secure is supported for card. While optional, enabling this rule can reduce fraud, though it may slightly lower the conversion rate.
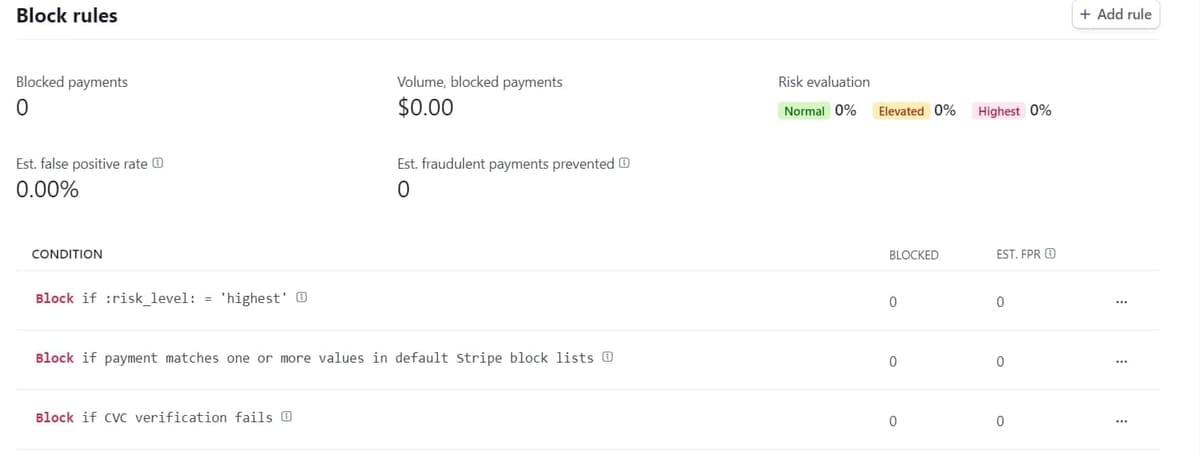
- Ensure that the following Block Rules are enabled:
- Block if :risk_level: = 'highest'
- Block if payment matches one or more values in default Stripe block lists
- Block if CVC verification fails
-
Payment Methods
- Go to Settings > Payment methods and enable the payment methods you want to offer to your customers.
- You can also enable the payment methods for test and live modes separately.
- Most settings are enabled by default. But in general we recommend enabling the following payment methods:
- Card
- Amazon Pay
- Apple Pay
- Cash App Pay
- Google Pay
- Link
Create Product
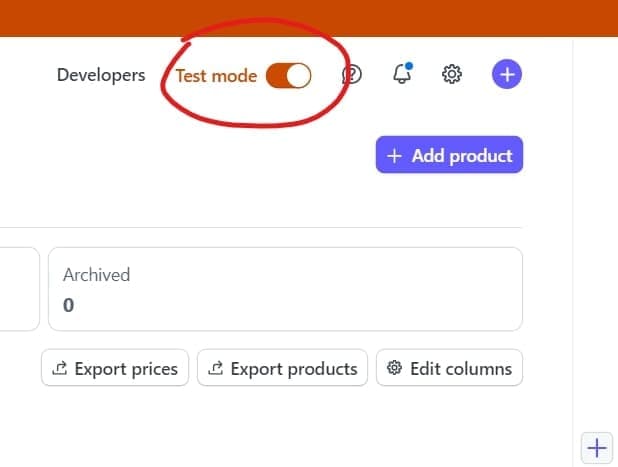
Test mode
Test mode allows you to simulate transactions during the development phase. You can test all features before going live.
-
Toggle test mode on
-
Go to Product catalog and click "Add Product"
-
Fill in product details
- Fill in the required information: Name, Description, Payment Mode (Recurring or One-off), and Amount.
- Also upload an image for your product. This will be shown in the checkout page.
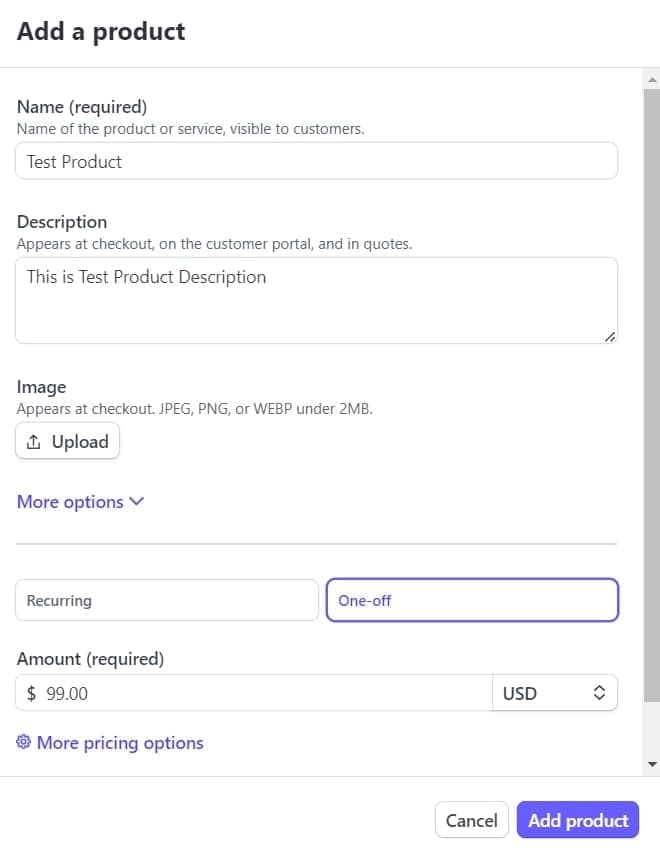
- Recurring payment is for subscription models. Set the billing period (e.g., monthly, yearly) according to your needs.
-
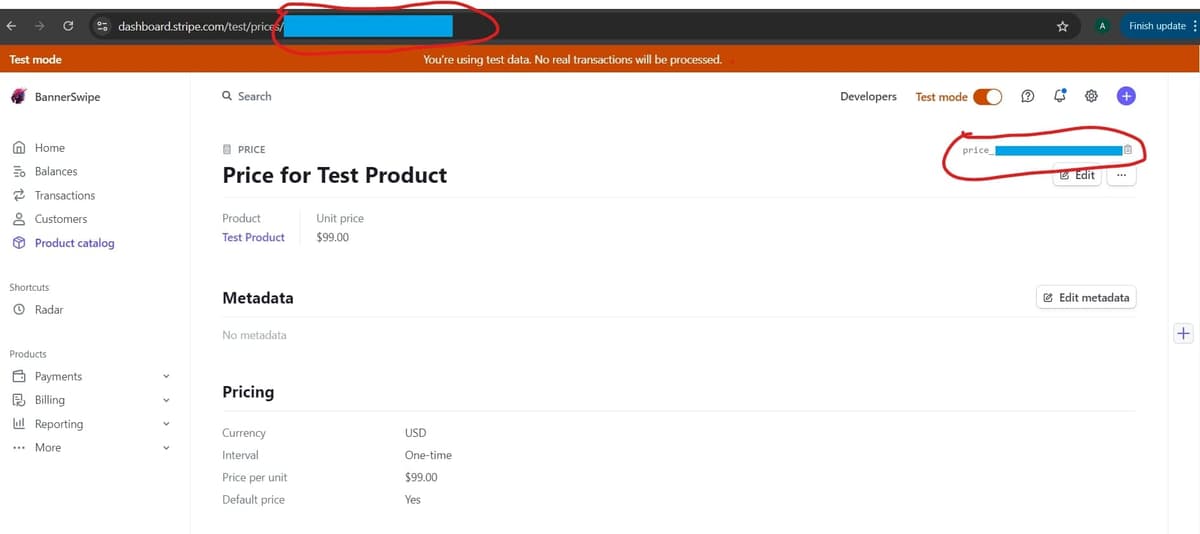
Copy the price-id from the product page
- Inside the product, click on the price to view the price-id. Copy the price-id. We will use this in the following steps.
Live Mode
This is the mode you want to use in production. Follow the same steps as Test Mode, but with test mode toggled off.
Webhook and Stripe Environment Variables Setup
Test mode
-
Set environment variables
- Open the .env.local file in your project's root folder. If it doesn't exist, rename .env.example to .env.local.
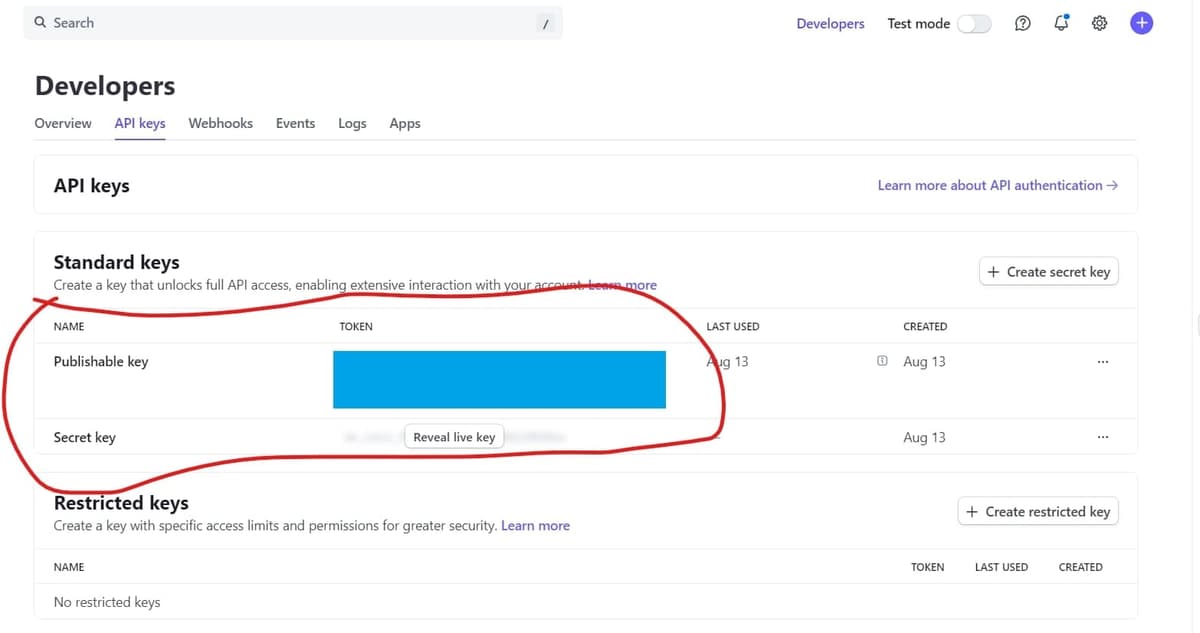
- In Stripe, ensure Test Mode is on. Navigate to Developers > API Keys and copy the Publishable Key and Secret Key.
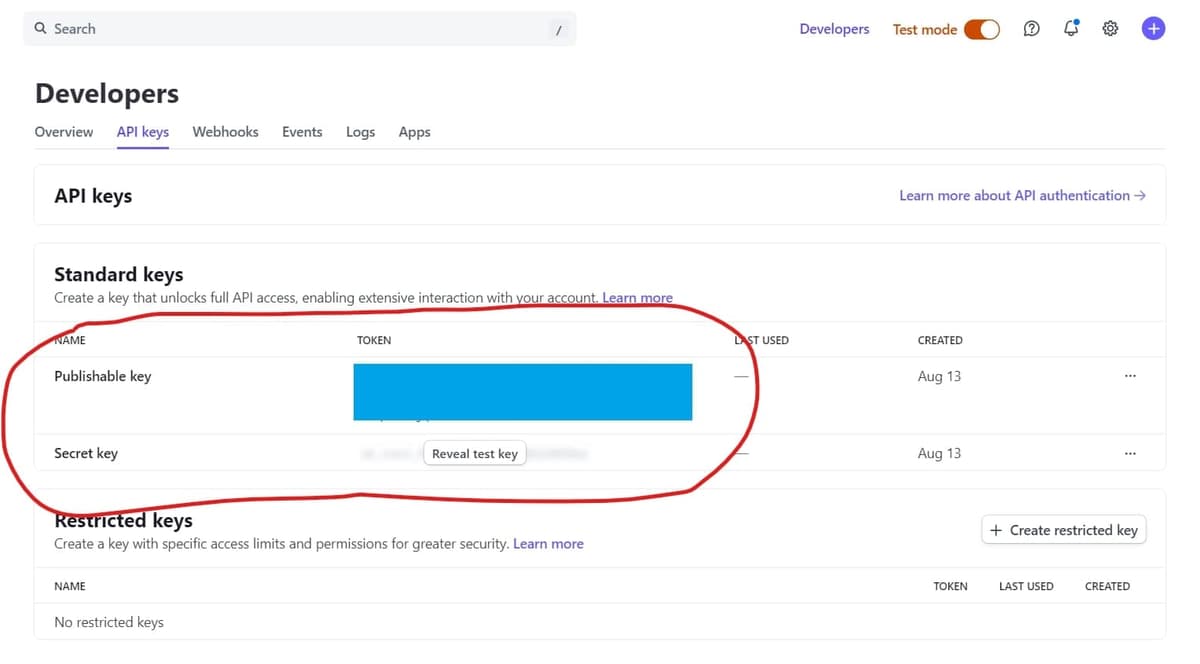
- Set the keys in .env.local as follows:
STRIPE_PUBLIC_KEY: Publishable Key from StripeSTRIPE_SECRET_KEY: Secret Key from Stripe
- If you're working in a live test server, you might configure this key differently, such as within the server's environment variable settings.
-
Set up webhooks
-
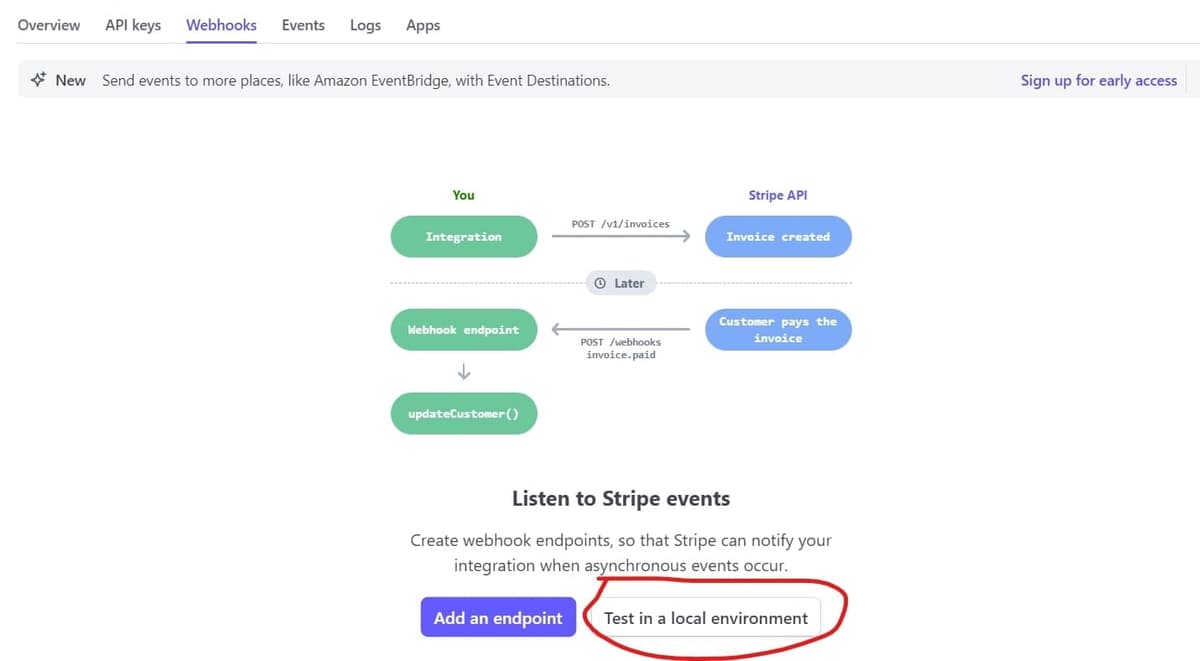
Configure Webhooks in Stripe by going to Developers > Webhooks. Webhooks listen to Stripe events like checkout completions and invoice payments.
-
You can listen to Stripe events in two ways while in test mode:
a. Using Stripe CLI:
- Click on "Test in a local environment"
- Download and install Stripe CLI following this tutorial: Stripe CLI Documentation (opens in a new tab).
- Run
stripe loginin your terminal (on Mac) or PowerShell (on Windows). - Forward events to your webhook by using the following command:
stripe listen --forward-to localhost:3000/api/payments/stripe/webhook- Make sure you use the correct port number where your localhost NextJS app is running!
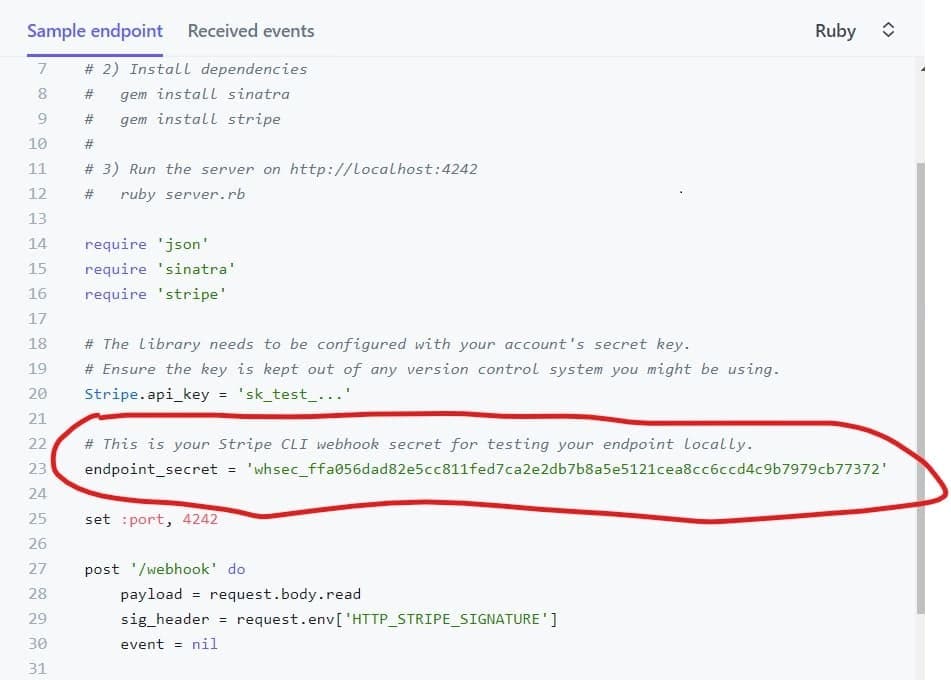
- Set STRIPE_WEBHOOK_SECRET in .env.local as the value of the endpoint_secret in the sample endpoint.
- Keep the terminal or PowerShell open so it can listen for Stripe events.
b. Using a live endpoint:
- Click "Add an endpoint" and type your endpoint URL (
https://www.yourdomain.com/api/payments/stripe/webhook). Just replacewww.yourdomain.comwith your actual domain.
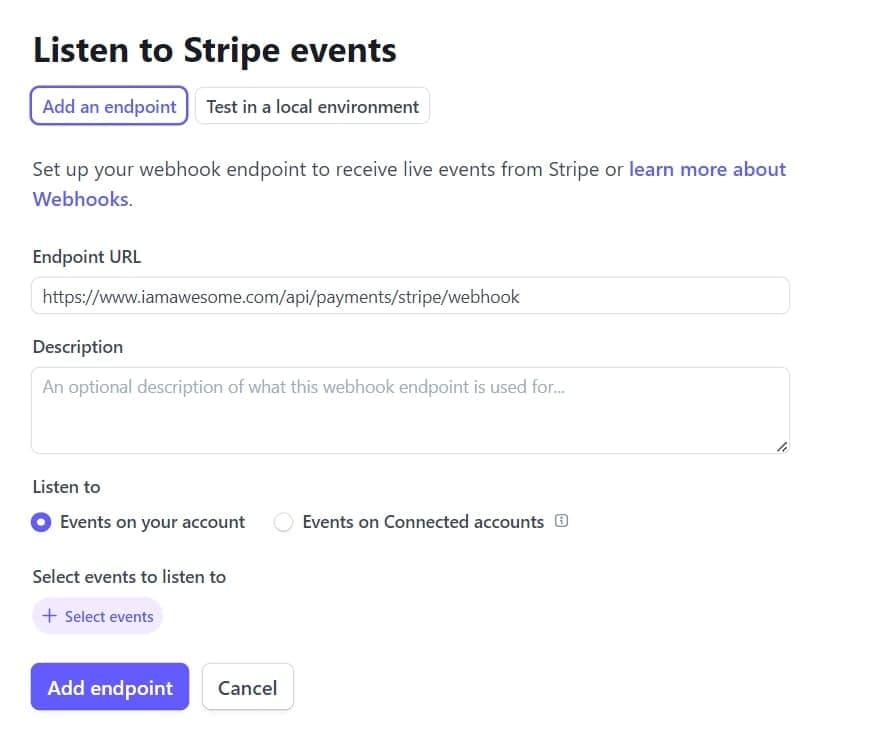
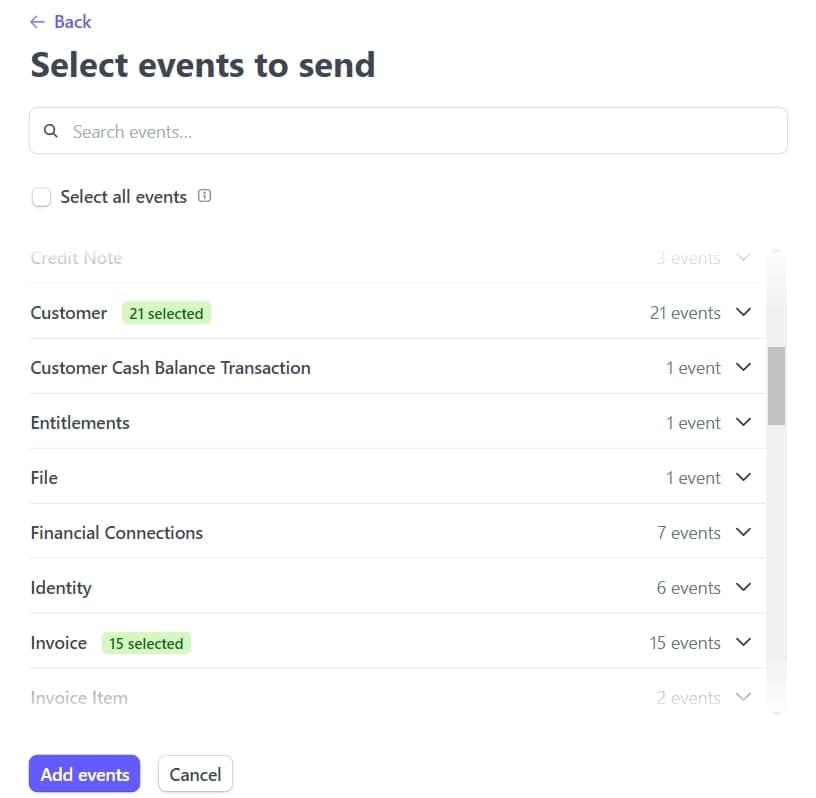
- Click on "Select Events" to choose the events you want to listen to.
- Select all checkout events, customer events, and invoice events, then click "Add Events."
- Then click "Add Endpoint." Click "Reveal" to view your signing secret.
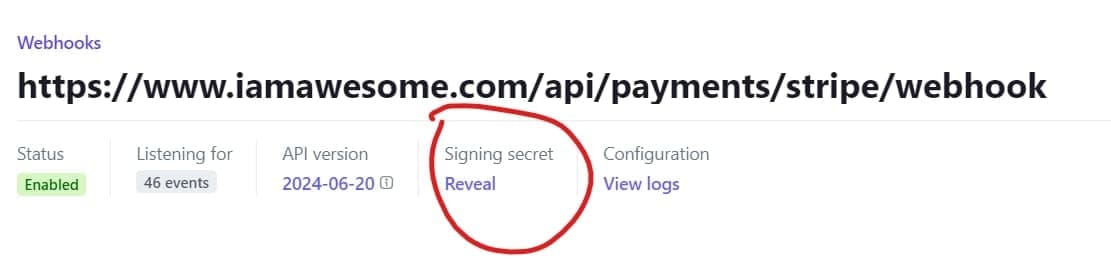
- Set
STRIPE_WEBHOOK_SECRETin .env.local as the signing secret. If you're working in a live test server, you might configure this key differently, such as within the server's environment variable settings. - Now, Stripe events for payments will be listened to by the above endpoint. Make sure your website is deployed at
https://www.yourdomain.com.
-
Live Mode
- Toggle Test Mode off in Stripe.
- Repeat the process above with your live keys and endpoints like given below.
-
Set environment variables
- Navigate to Developers > API Keys and copy the Publishable Key and Secret Key.
- Set the keys in .env.local as follows:
STRIPE_PUBLIC_KEY: Publishable Key from StripeSTRIPE_SECRET_KEY: Secret Key from Stripe
- As you're working in a live server, you might configure this key differently, such as within the server's environment variable settings.
-
Set up webhooks
- Configure Webhooks in Stripe by going to Developers > Webhooks. Webhooks listen to Stripe events like checkout completions and invoice payments.
- Click "Add an endpoint" and type your endpoint URL (
https://www.yourdomain.com/api/payments/stripe/webhook). Just replacewww.yourdomain.comwith your actual domain.
- Click on "Select Events" to choose the events you want to listen to.
- Select all checkout events, customer events, and invoice events, then click "Add Events."
- Then click "Add Endpoint." Click "Reveal" to view your signing secret.
- Set
STRIPE_WEBHOOK_SECRETin .env.local as the signing secret. As you're working in a live server, you might configure this key differently, such as within the server's environment variable settings. - Now, Stripe events for payments will be listened to by the above endpoint. Make sure your website is deployed at
https://www.yourdomain.com.
Supabase Environment Variables Setup
We use Supabase to store customer information. Ensure the following keys are configured:
NEXT_PUBLIC_SUPABASE_URL: Your Supabase project URLSUPABASE_SERVICE_ROLE_KEY: Your Supabase service role key
For more details, refer to the Supabase setup guide: Supabase Setup Guide.
Supabase Configuration
- To enable Webhooks, we need to create tables to manage customer data, set up essential RPC functions, and configure triggers to handle payments and subscriptions.
- For detailed instructions, refer to the Supabase configuration guide: Supabase Configuration Guide.
Payment Settings in settings.js
The settings.js file, located at /settings.js is the central configuration file for your StartupBolt application. This file contains various settings that control different aspects of your app, allowing for easy customization and management of your project's core parameters. It is important to update these configuration values as per your product or service.
- PAYMENT_PROVIDER
- Set this to Stripe:
const PAYMENT_PROVIDER = "Stripe";
- NO_AUTH_CHECKOUT
- Set this to true if you want to enable checkout for users who are not authenticated (i.e., not signed in).
- Enabling checkout without authentication is usually recommended, as it reduces the number of steps users need to take to purchase your product. However, the decision is yours.
- If you prefer to collect emails from users before they proceed to checkout, this can be a good strategy, though it may lower your conversion rate.
const NO_AUTH_CHECKOUT = true; // Enable checkout without authentication
// or
const NO_AUTH_CHECKOUT = false; // Require authentication for checkout
- PLAN_DETAILS
- This is where you configure the various payment plans.
   const PLAN_DETAILS = [
     {
       name: "Plan Name",
       price: 147,
       anchorPrice: 197,
       currency: "USD",
       pricePeriod: "monthly", // Leave empty for one-off payments
       description: "Product Description",
       features: [
         { name: "Feature 1", hasFeature: true },
         // ... more features
       ],
       payment: {
         id: "stripe_price_id",
         credits: 100, // Default is 100, can be changed
         rollover: false, // Credits are refilled, not rolled over
         mode: "payment", // Use "subscription" for recurring payments
         couponId: "stripe_coupon_id",
       },
       isPopular: true
     },
     // ... more plans
];name: The name of the plan.price: The actual price of the plan user will pay.anchorPrice: The price of the plan before the discount.currency: The currency of the plan shown in the pricing table.pricePeriod: The period of the plan shown in the pricing table. Leave empty for one-off payments.description: The description of the plan shown in the pricing table.features: The features of the plan shown in the pricing table. hasFeature is a boolean value that shows in the pricing table if the feature is included in the plan or not.payment: The payment details of the plan. Inside this, we have:id: The price-id from Stripe that we copied in a previous step.Credits: Set to any number (default 100). Access to the product is granted if credits are greater than 0.Rollover:false: Credits are refilled on payment, access lost if subscription lapses.true: Unused credits carry over, access maintained until credits are depleted.
Mode: Use "payment" for one-off payments, "subscription" for recurring payments.CouponId:- Create coupons in Product Catalog > Coupons (separate for test and live modes).
- If you don't include a couponId, customers can apply their own coupon codes. For more details, refer to the Coupons Documentation
isPopular: Set to true if you want to show this plan with a special badge in the pricing table.- You can also send the
PLAN_DETAILSarray as a prop to the PricingTable module. Feel free to refer to the PricingTable Module Documentation for more details. - Also, you can pass a single object from the
PLAN_DETAILSarray as a prop to the PayButton module. Feel free to refer to the PayButton Module Documentation for more details.
By following this guide, you'll have a comprehensive Stripe payment setup integrated into your application, covering both test and live environments.